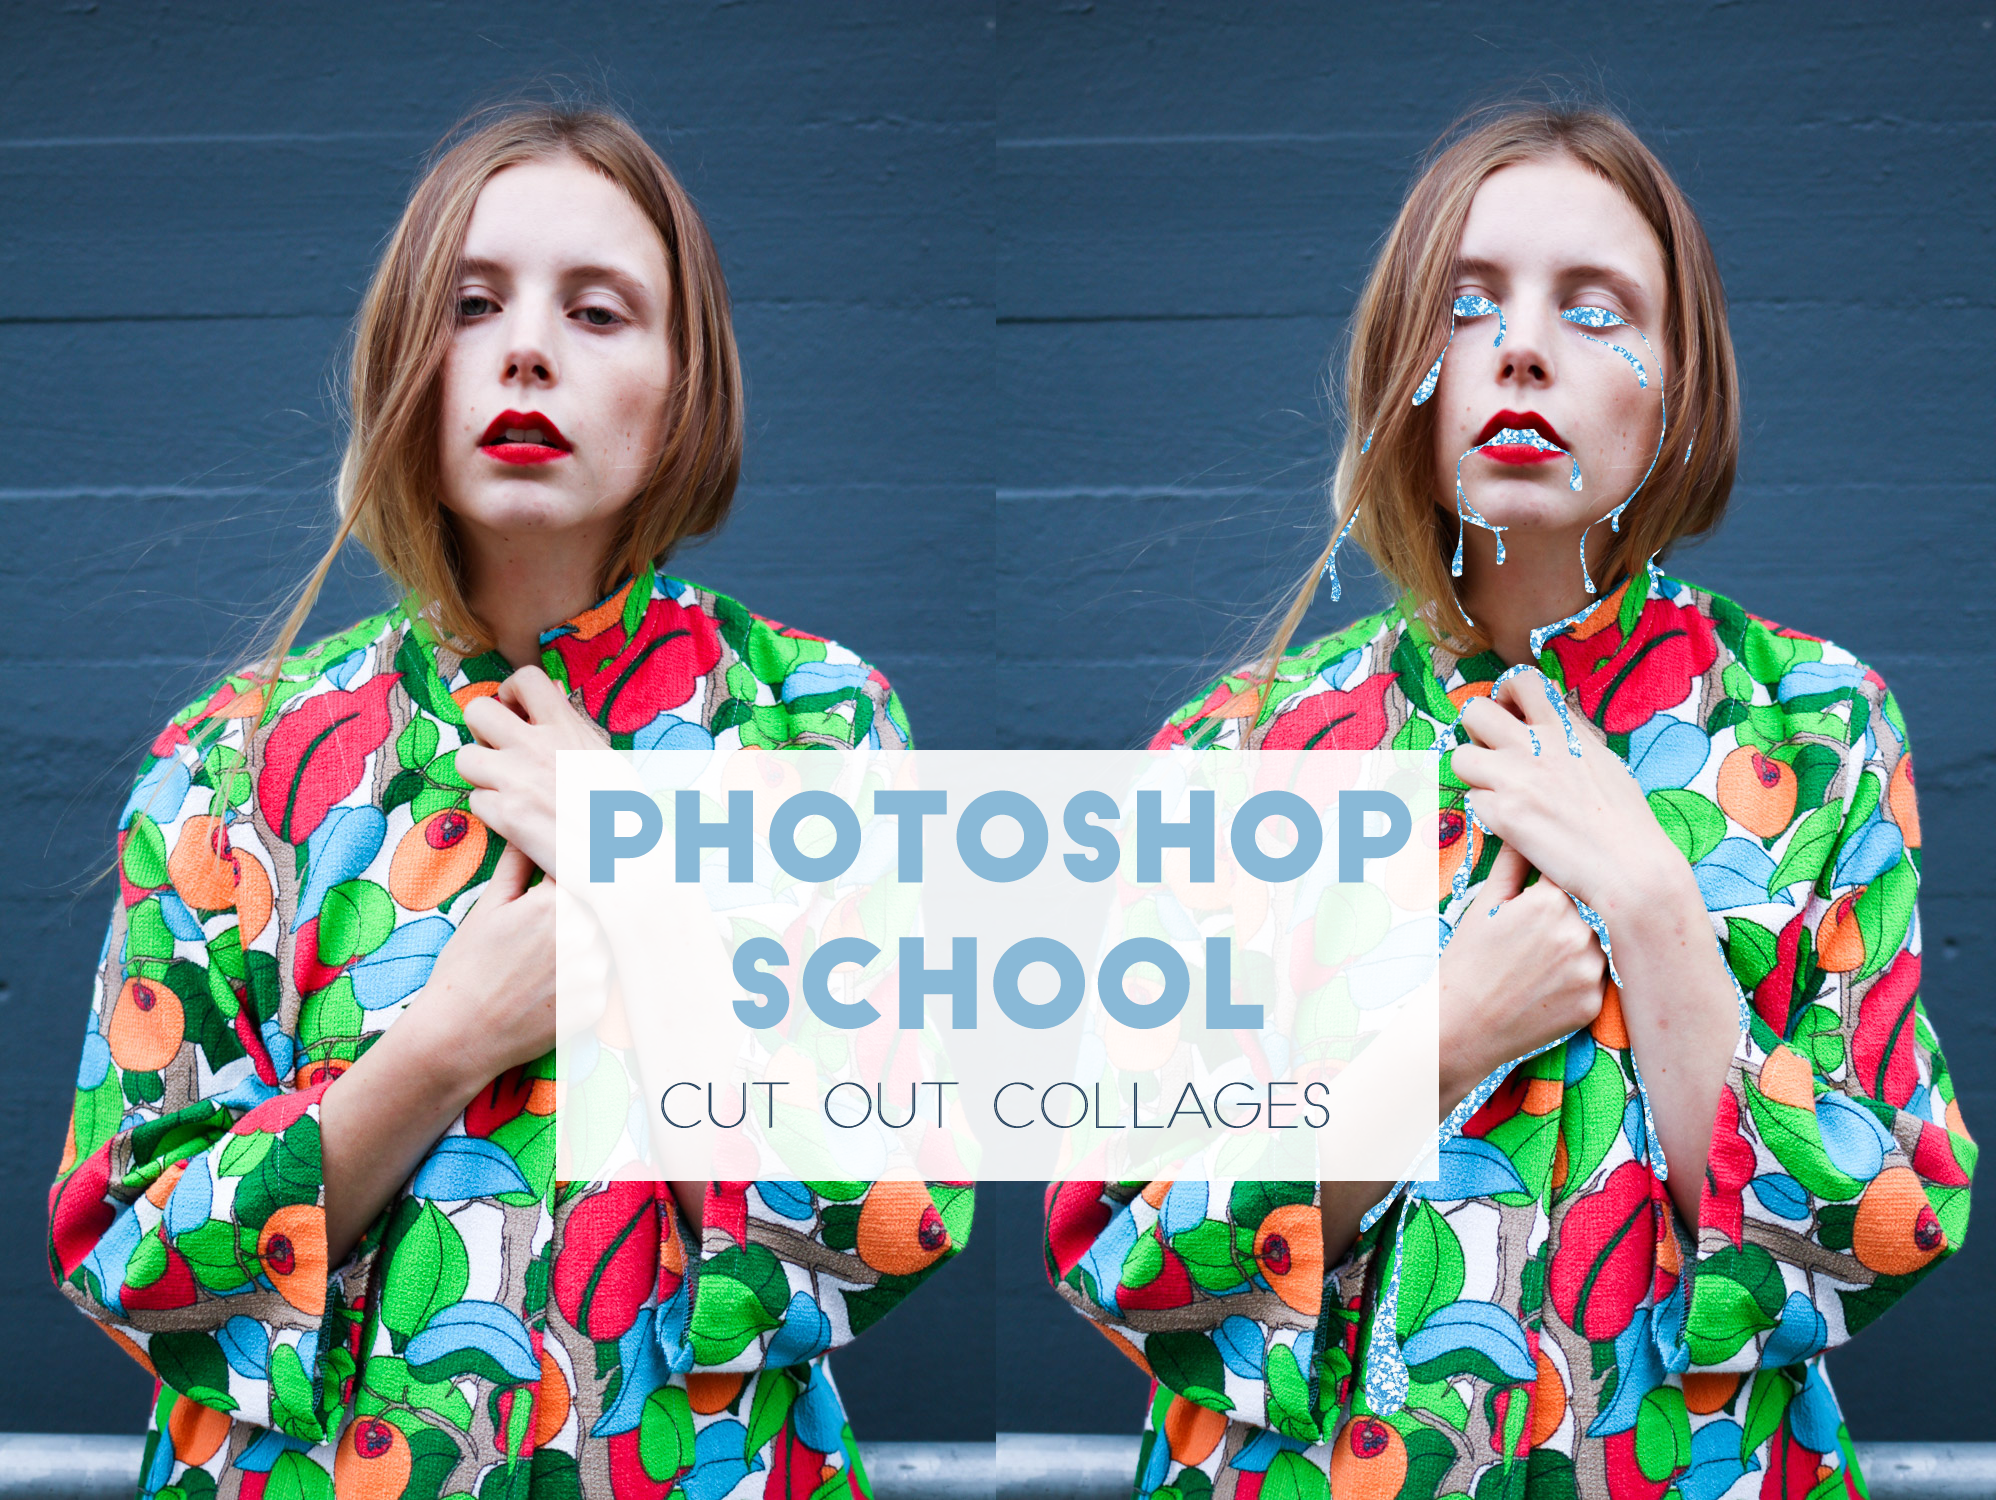

Finally, I’ve gotten started on a little photoshop school. A series of posts that show how I edit my photos and collages for the blog. We’ll start very appropriately after yesterday’s changes post with a guide on how I make those collages – and in general, how to do cut out collages, cutting out stuff and replacing the cut out hole with something else.
I’ll only be going through the editing, and not how you open an image and save them in photoshop.
Let’s get to it!
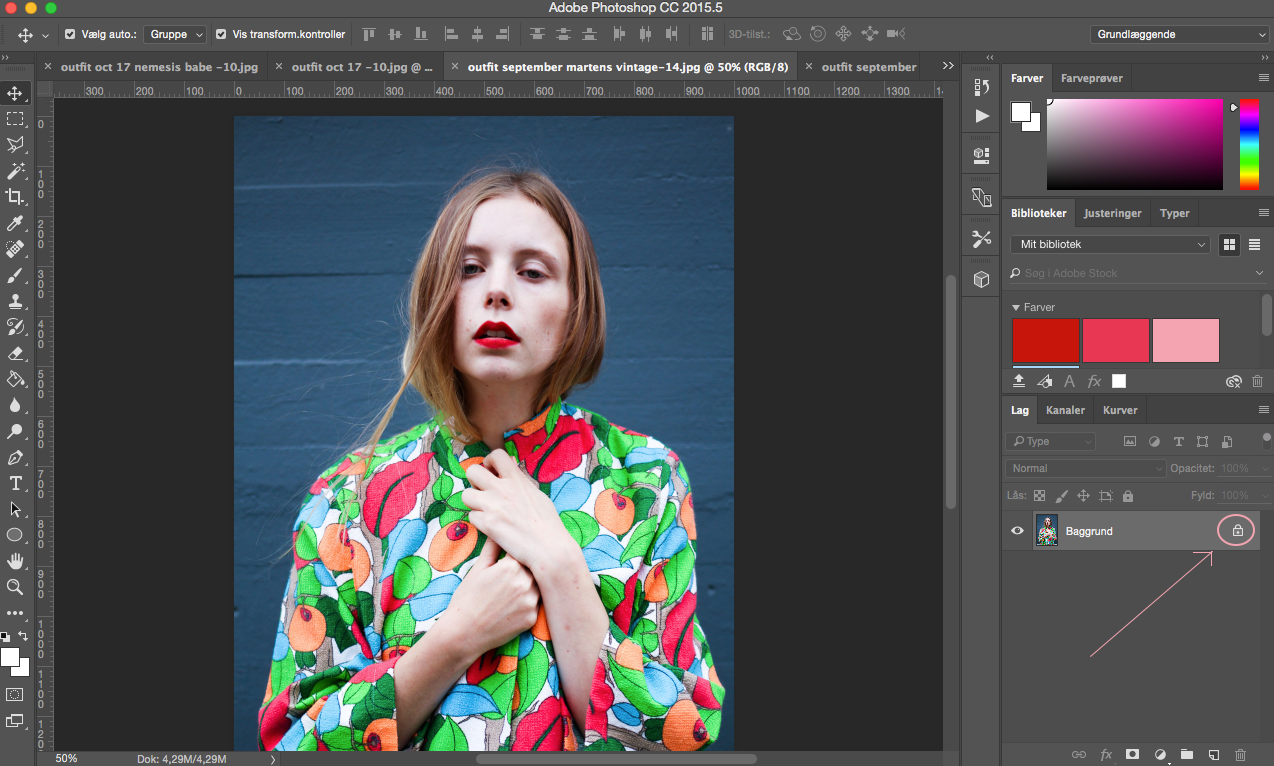
UNLOCK LAYER
To be able to do collages with more layers, it’s good to make the background see through and make all the layers able to be moved around. If the start image(this is a word that I came up with btw) is locked, that means that you can’t place anything under it and when you cut out, the cut out space will turn the background color in stead of see through. You unlock your layer by clicking the little padlock on the layer.
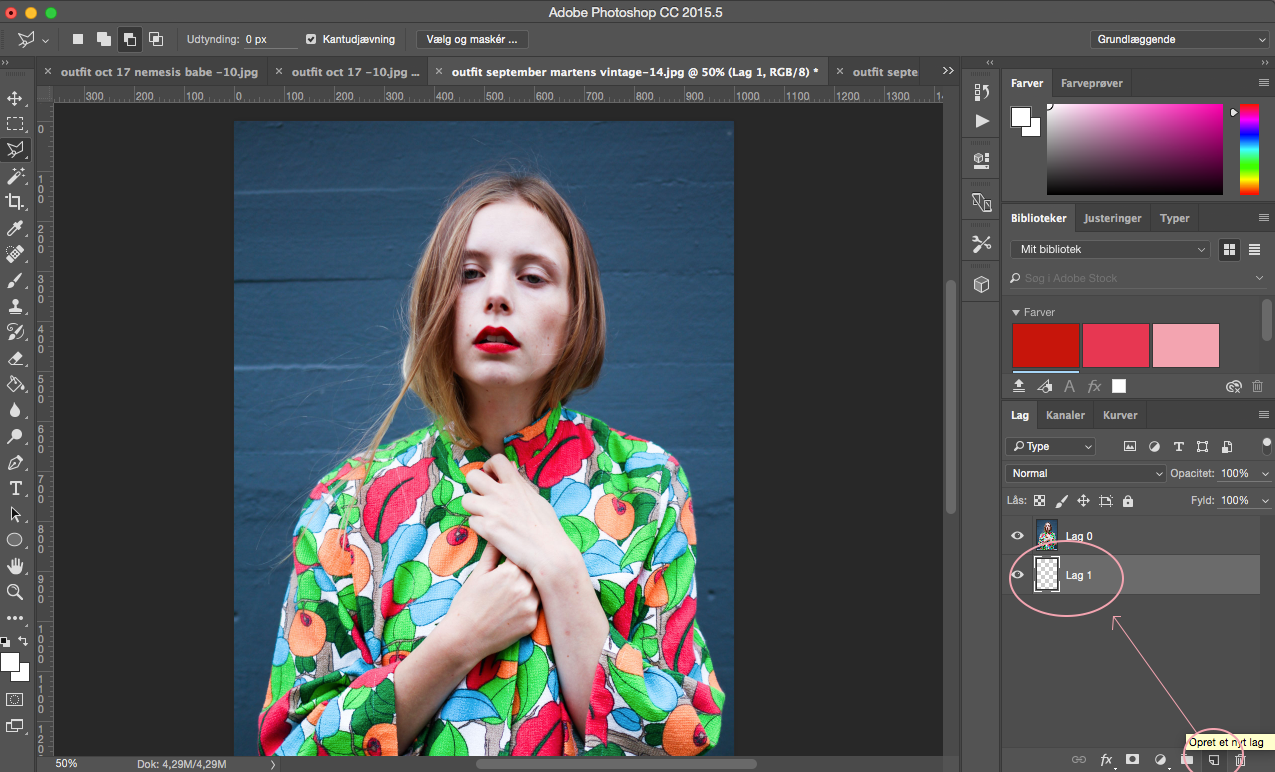
ADD A LAYER AND PLACE IT UNDER THE START IMAGE
To have a background to fill out your cut out holes, you need something underneath the start image. Press the little paper in the bottom right corner and pull the new layer underneath the start image by dragging it with the cursor.
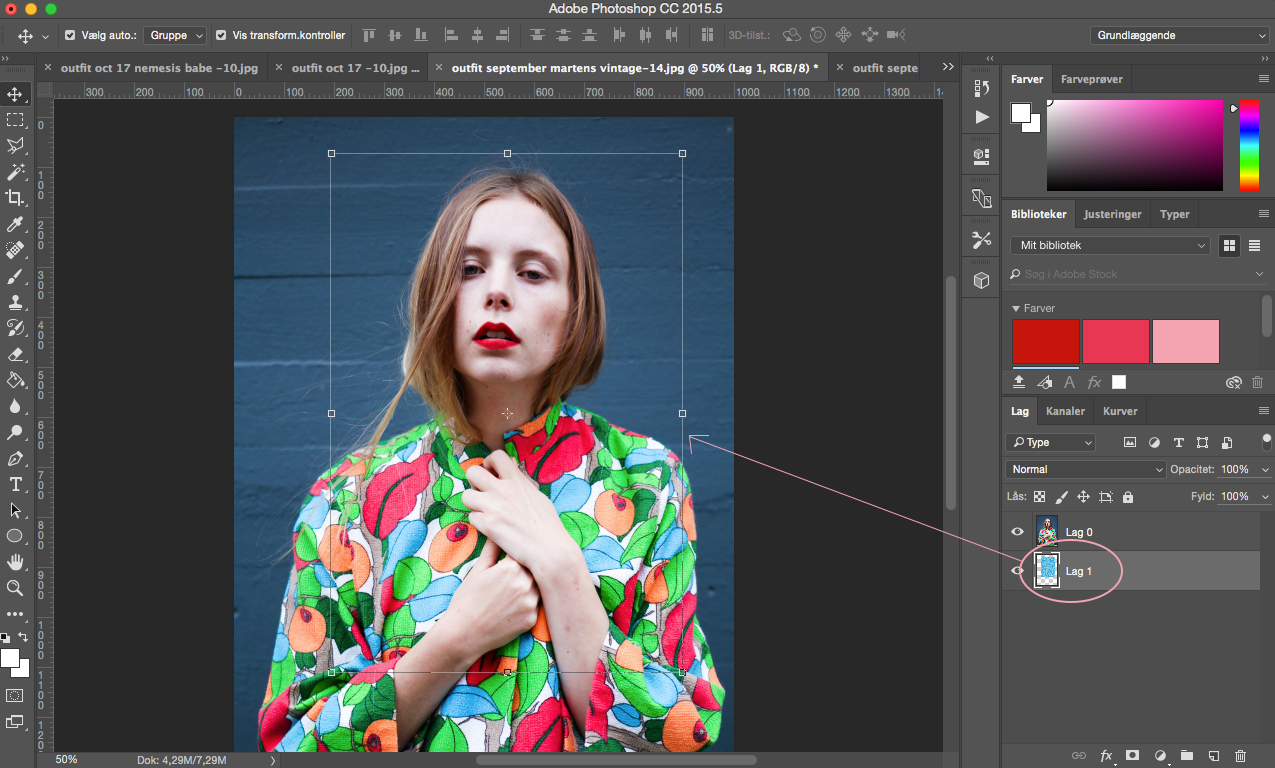
ADD A BACKGROUND
So, you need something to peek out of your cut outs in your picture. So select the bottom layer and paste a background into it. You can’t see the bottom layer since it’s covered by the one(s) above. If you click the eye by the layers they will turn invisible and if you click the same spot again, the layer will be visible again.
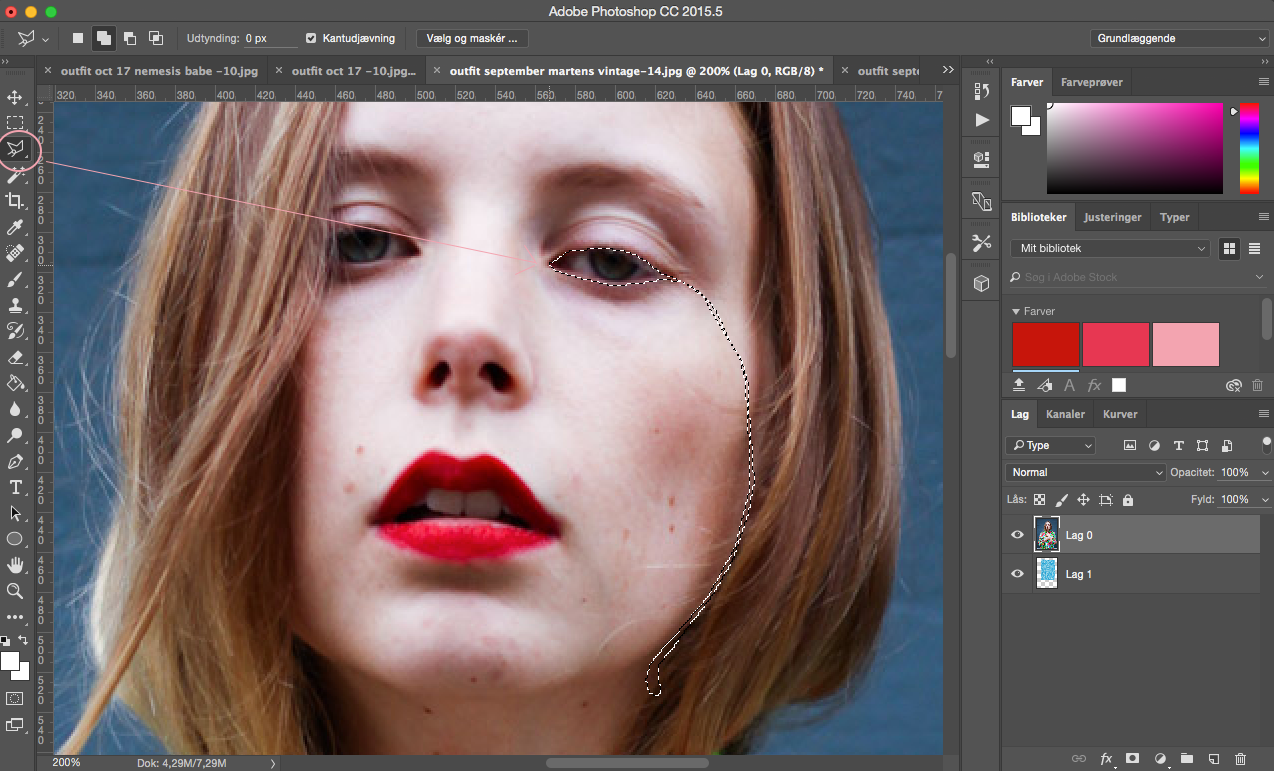
THE POLYGON LASSO TOOL
One of the simplest ways to cut out I think, is with the polygon lasso, which is in the tool menu on the left. You use it by clicking around the area that you want to cut out, and the path of your clicks forms a line around it. When you’ve finished, you clothe the line by going back to the starting point and the line will go stippled, which means that the area is chosen/marked.
When you’ve chosen the area to cut out, use the ctrl+x/cmd+x keyboard shortcut to cut the area away. Here, the layers below the layer you’ve cut should appear in the cut out hole.
If nothing happens, make sure to check which layer you’re working in, by being which layer is lighter than the others in the layer section on the right. If you’re working in the bottom layer, you’ve cut out something from that and not from your top layer.
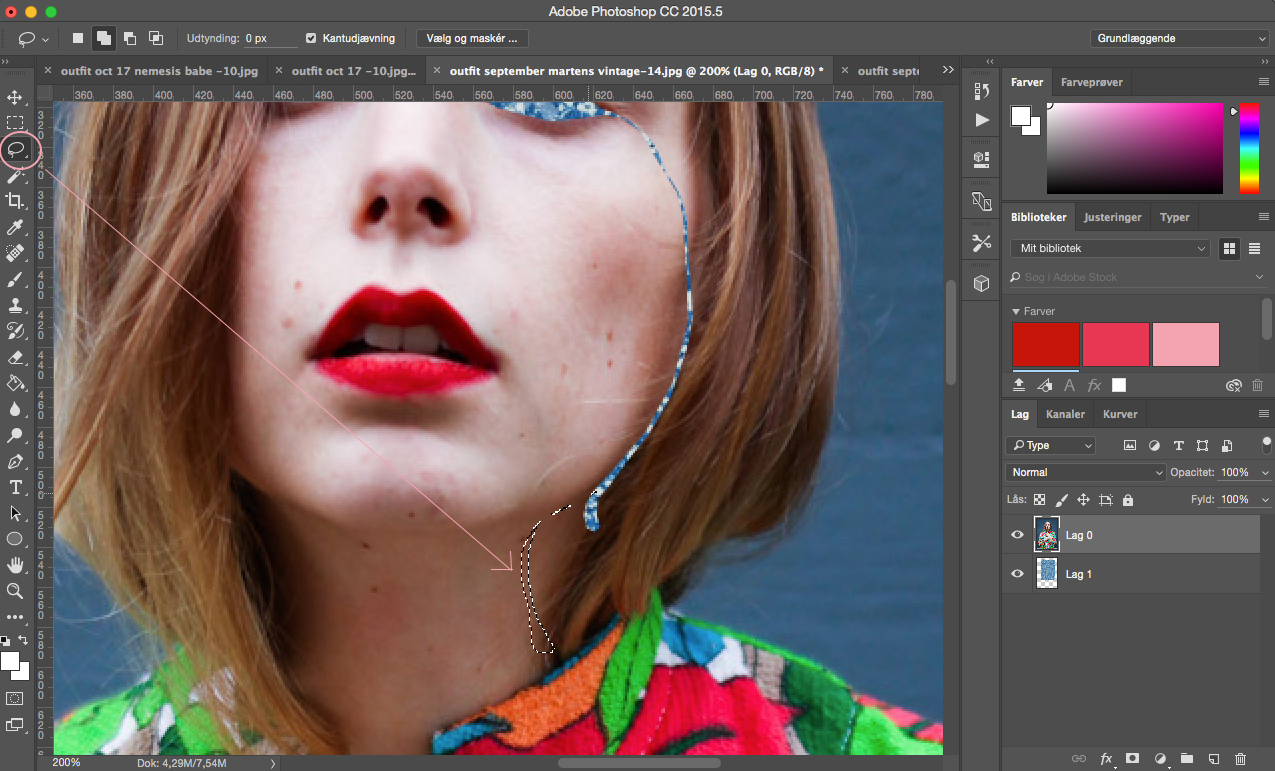 LASSO TOOL
When clicking the polygon lasso tool in the tool menu, a new, little drop down menu appears, where you can change between tools in the same category. In this you’ll find the lasso tool. This tool you can use for making more organic cut out shapes by holing down the cursor and “drawing” the shape. The one annoying thing about this tool is though that when you let go of the cursor, the shape will close itself, so it’s hard to make bigger, complicated shapes.
BOOM! When you’re done, you might end up with something like this:

HAVE YOU GUYS GOT ANY IDEAS OR REQUESTS FOR THINGS YOU WANNA LEARN IN PHOTOSHOP?
please tell me in the comments!