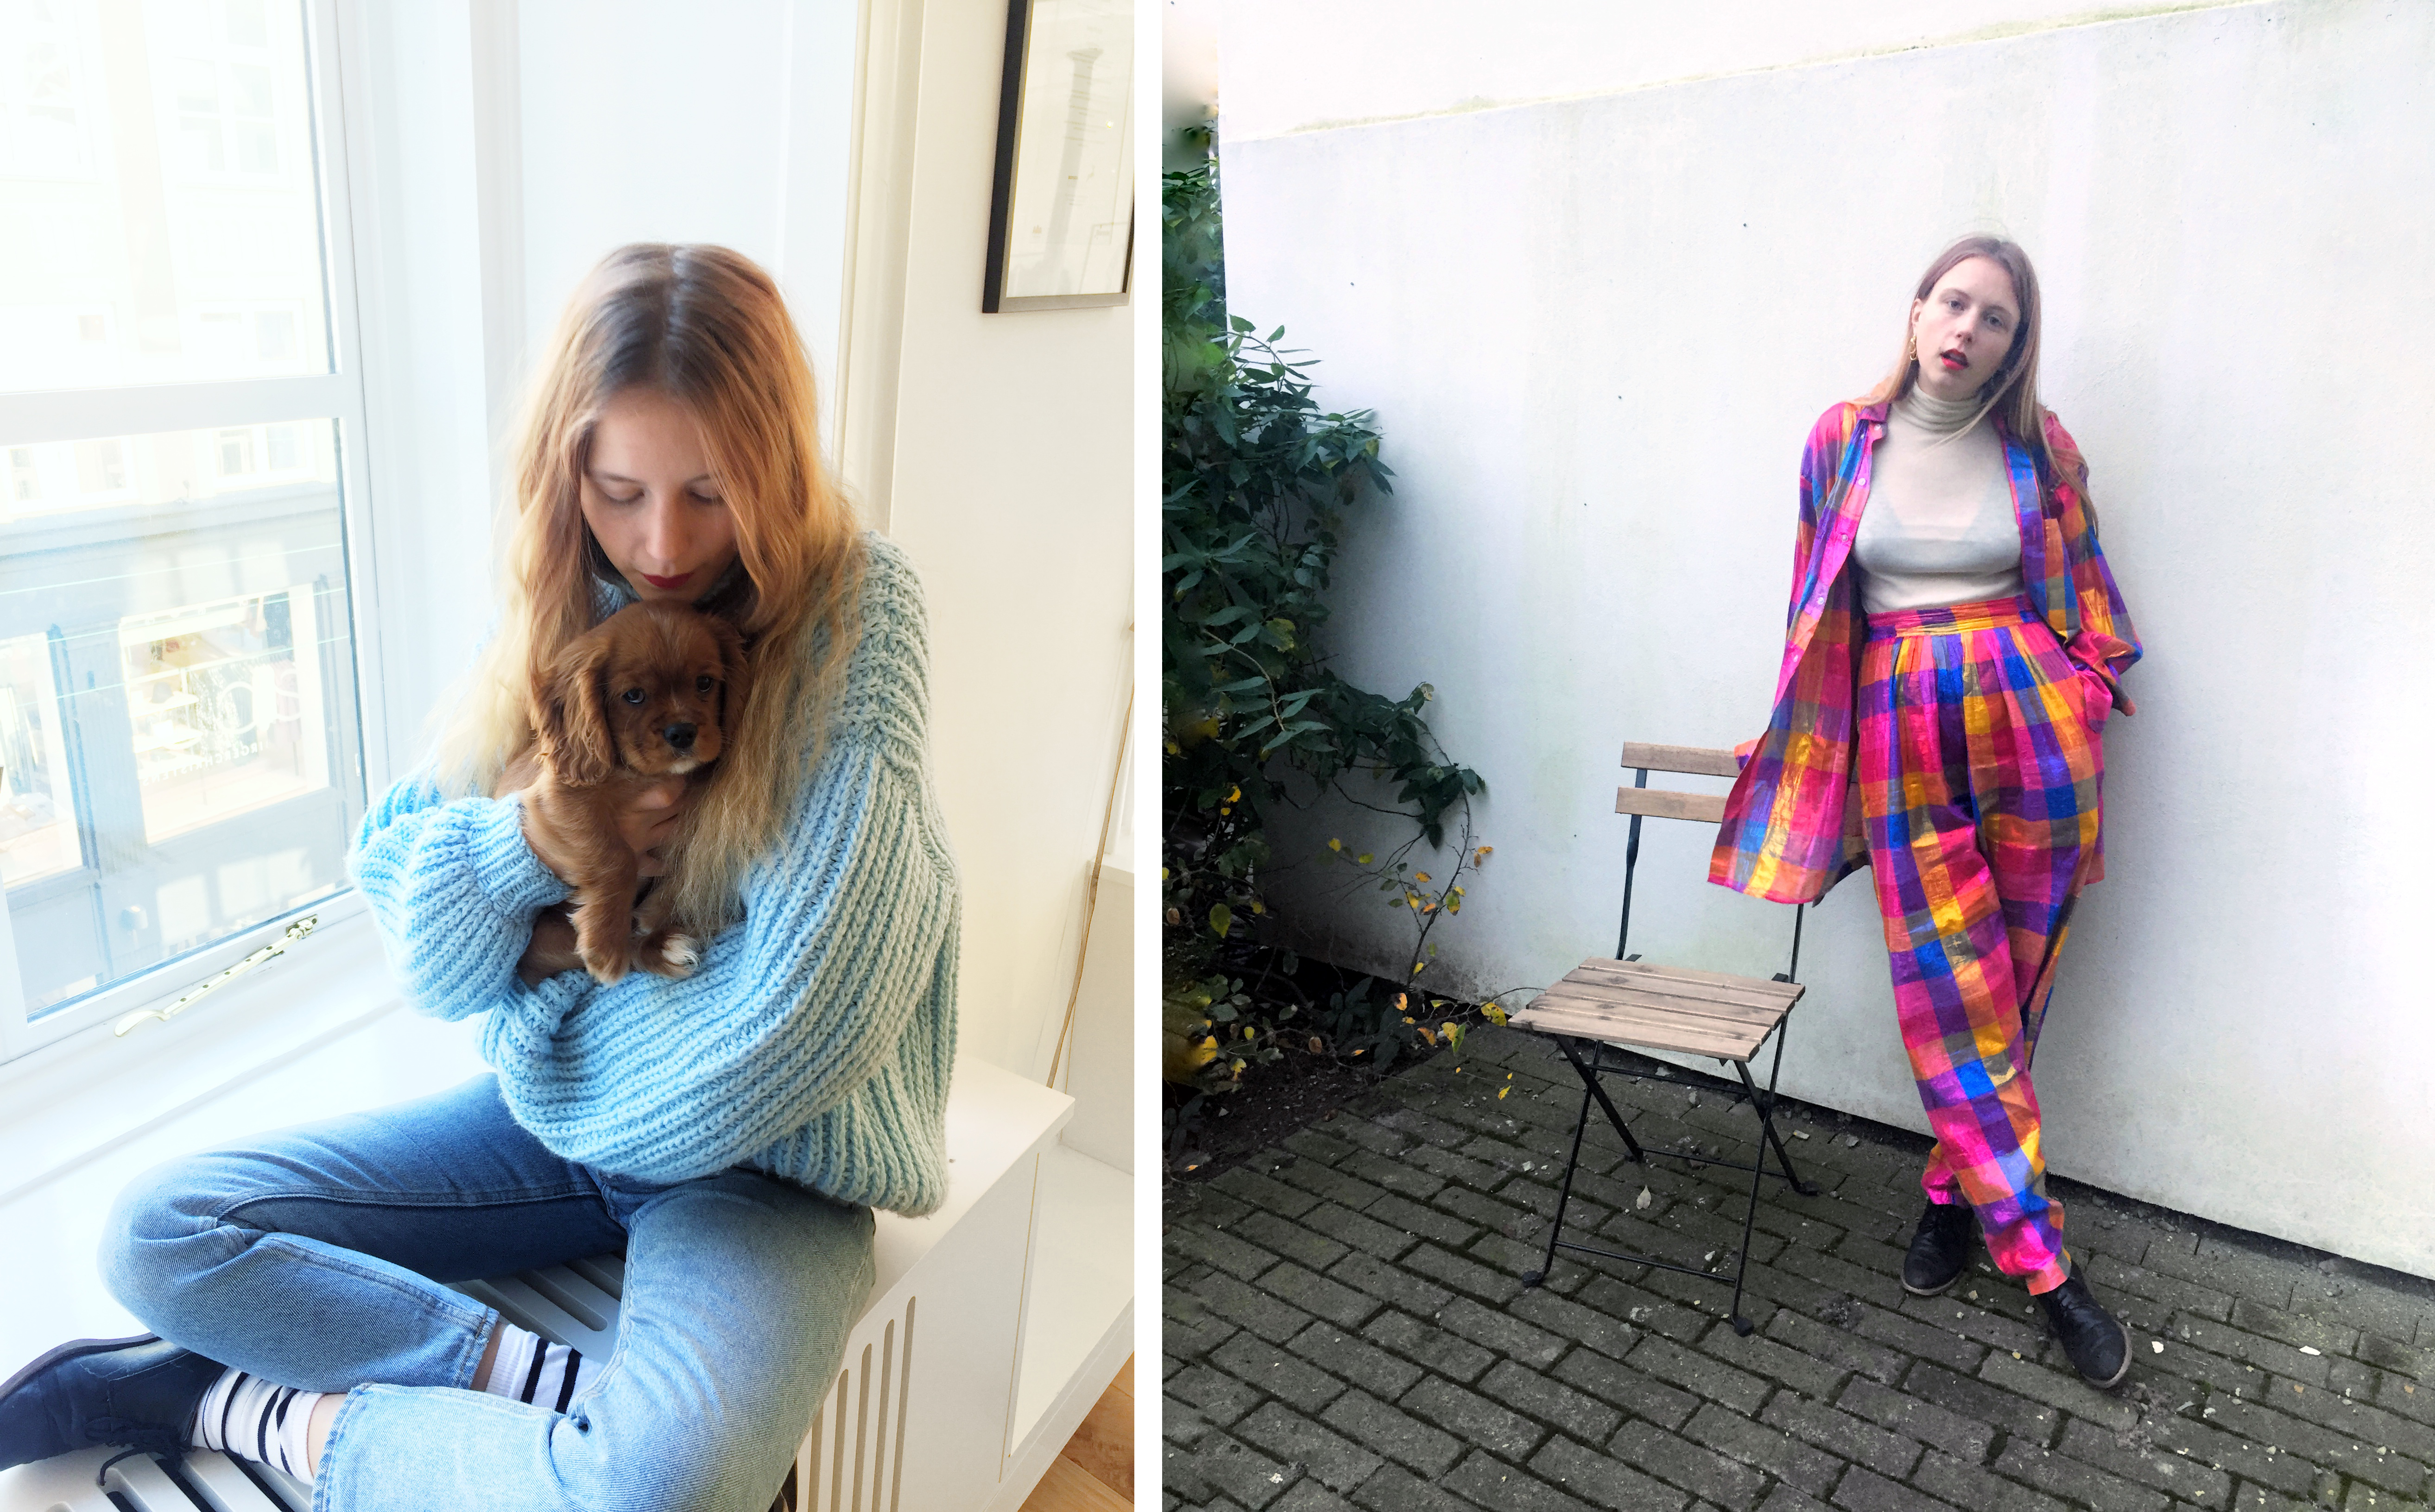
Back on track with the photo editing guides, and let’s start with something fun: editing pictures for Instagram. I bring you three examples of photos I edited in an app called SnapSeed which I think is the best photo editing app I’ve tried.
My app is in Danish, so bear with the Danish words on the screen shots – I’ll translate as well as I can and otherwise I think the app is set up graphically the same in every language.
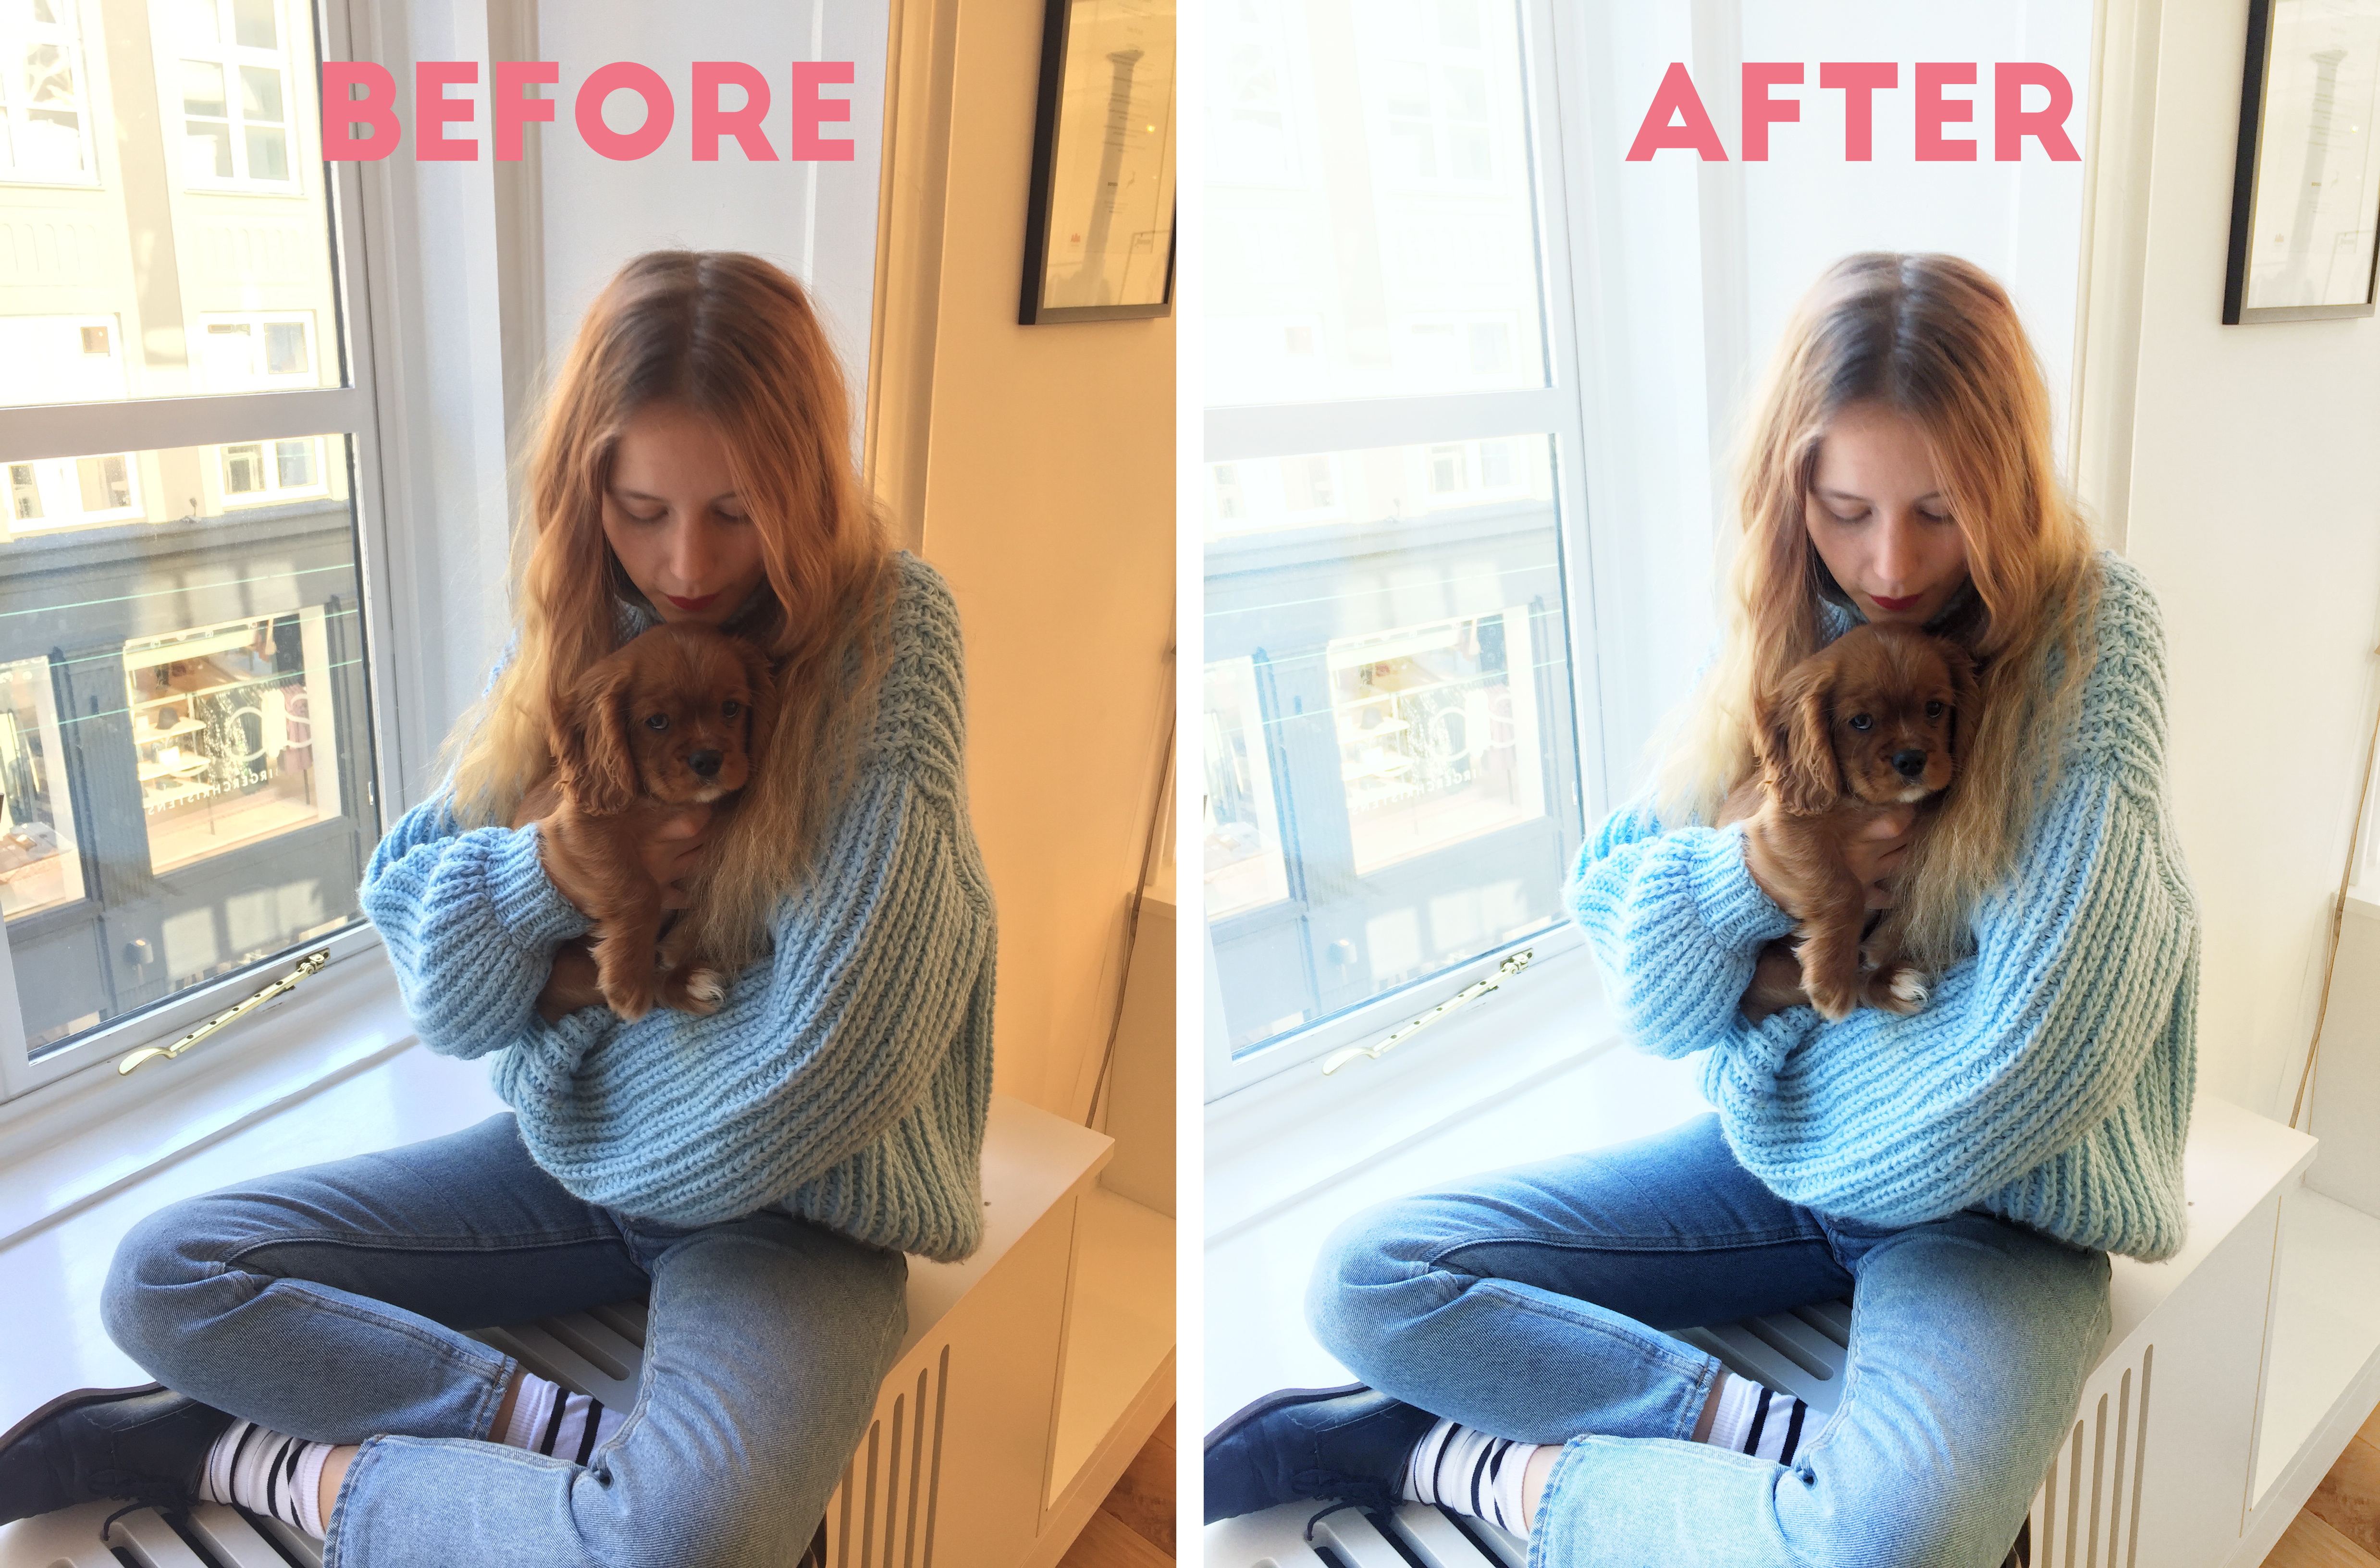
This is an example of a picture I posted on Instagram. Before editing, it had a weird, yellowy light and a disturbing background outside the window. After editing, the photo got lighter, has prettier contrasts, a cooler tone and nicer, clearer colors.
I edited it with the basic tools that I use every time:
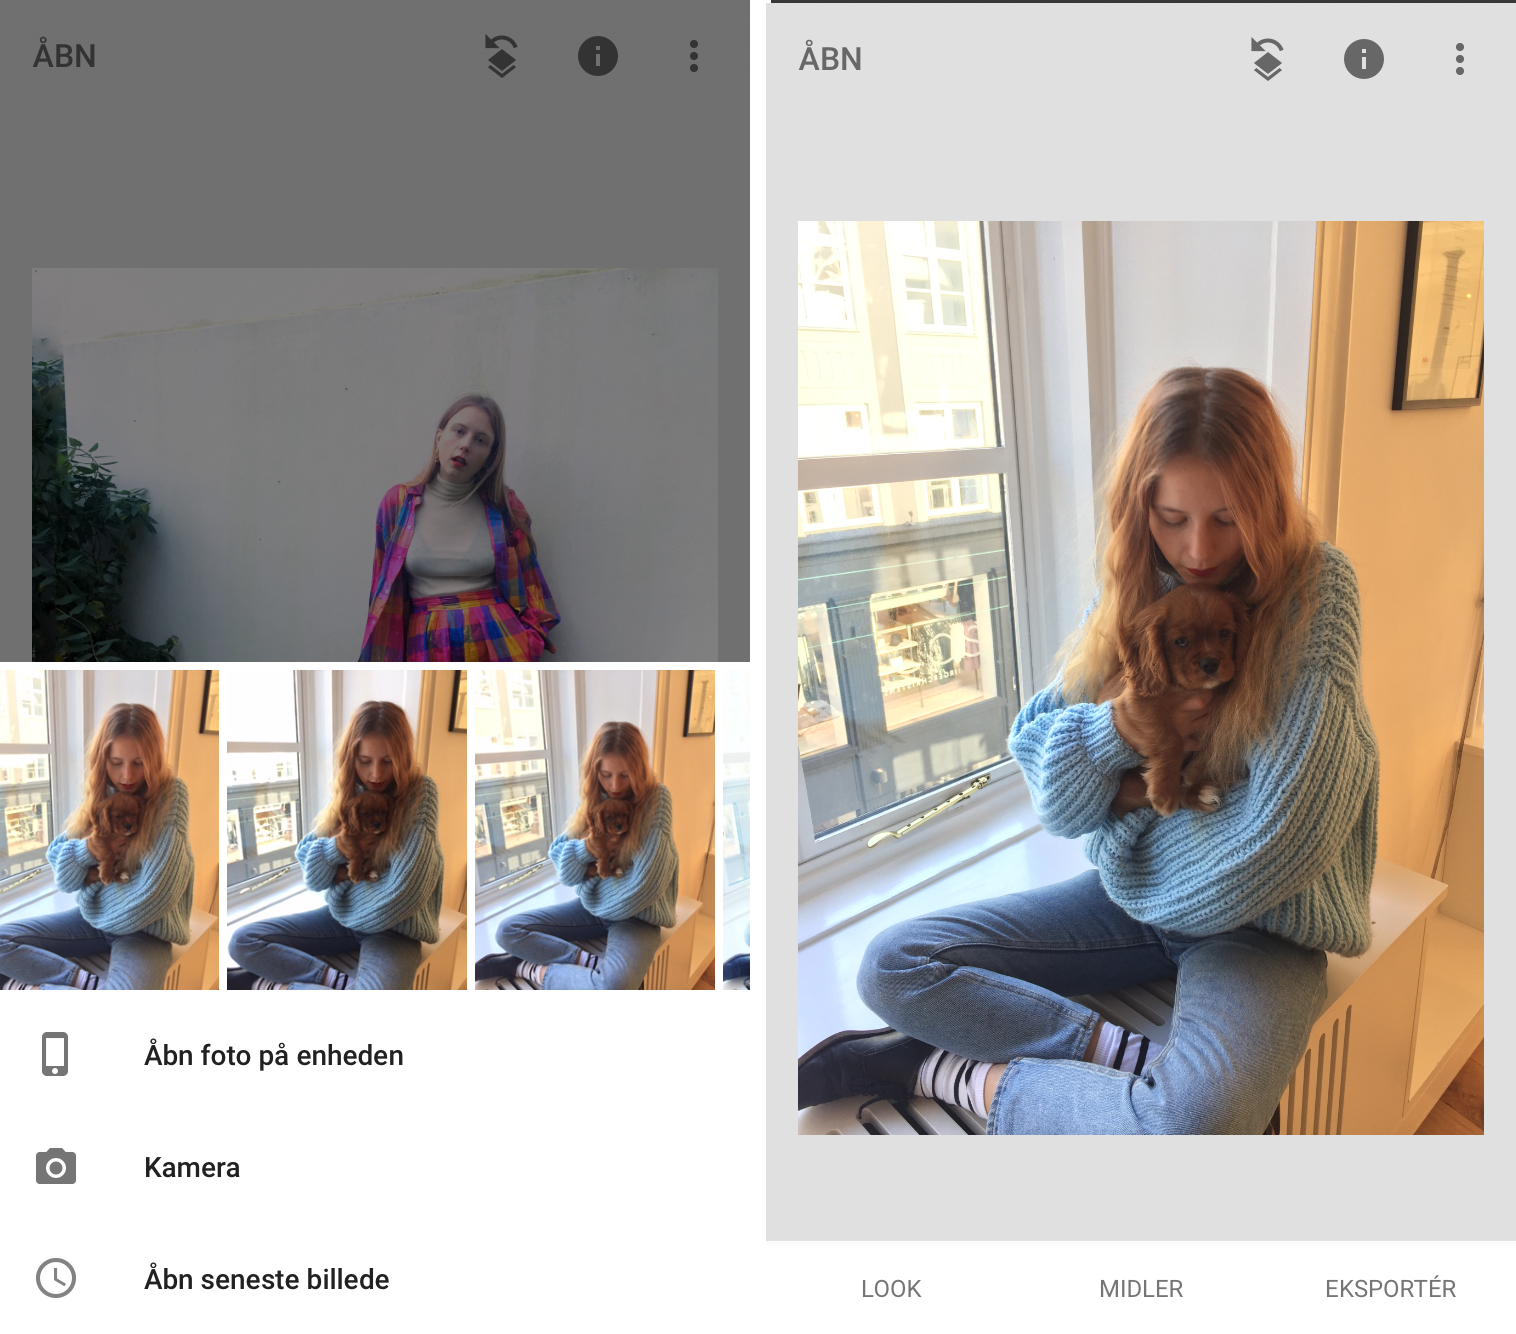 OPENING A PHOTO
In SnapSeed you can both scroll between the latest photos on your phone and go to specific folders on your phone and find the photo you need. I usually save the photos I wanna edit in my favorites folder, so I do the latter.
 LOOK & TOOLS
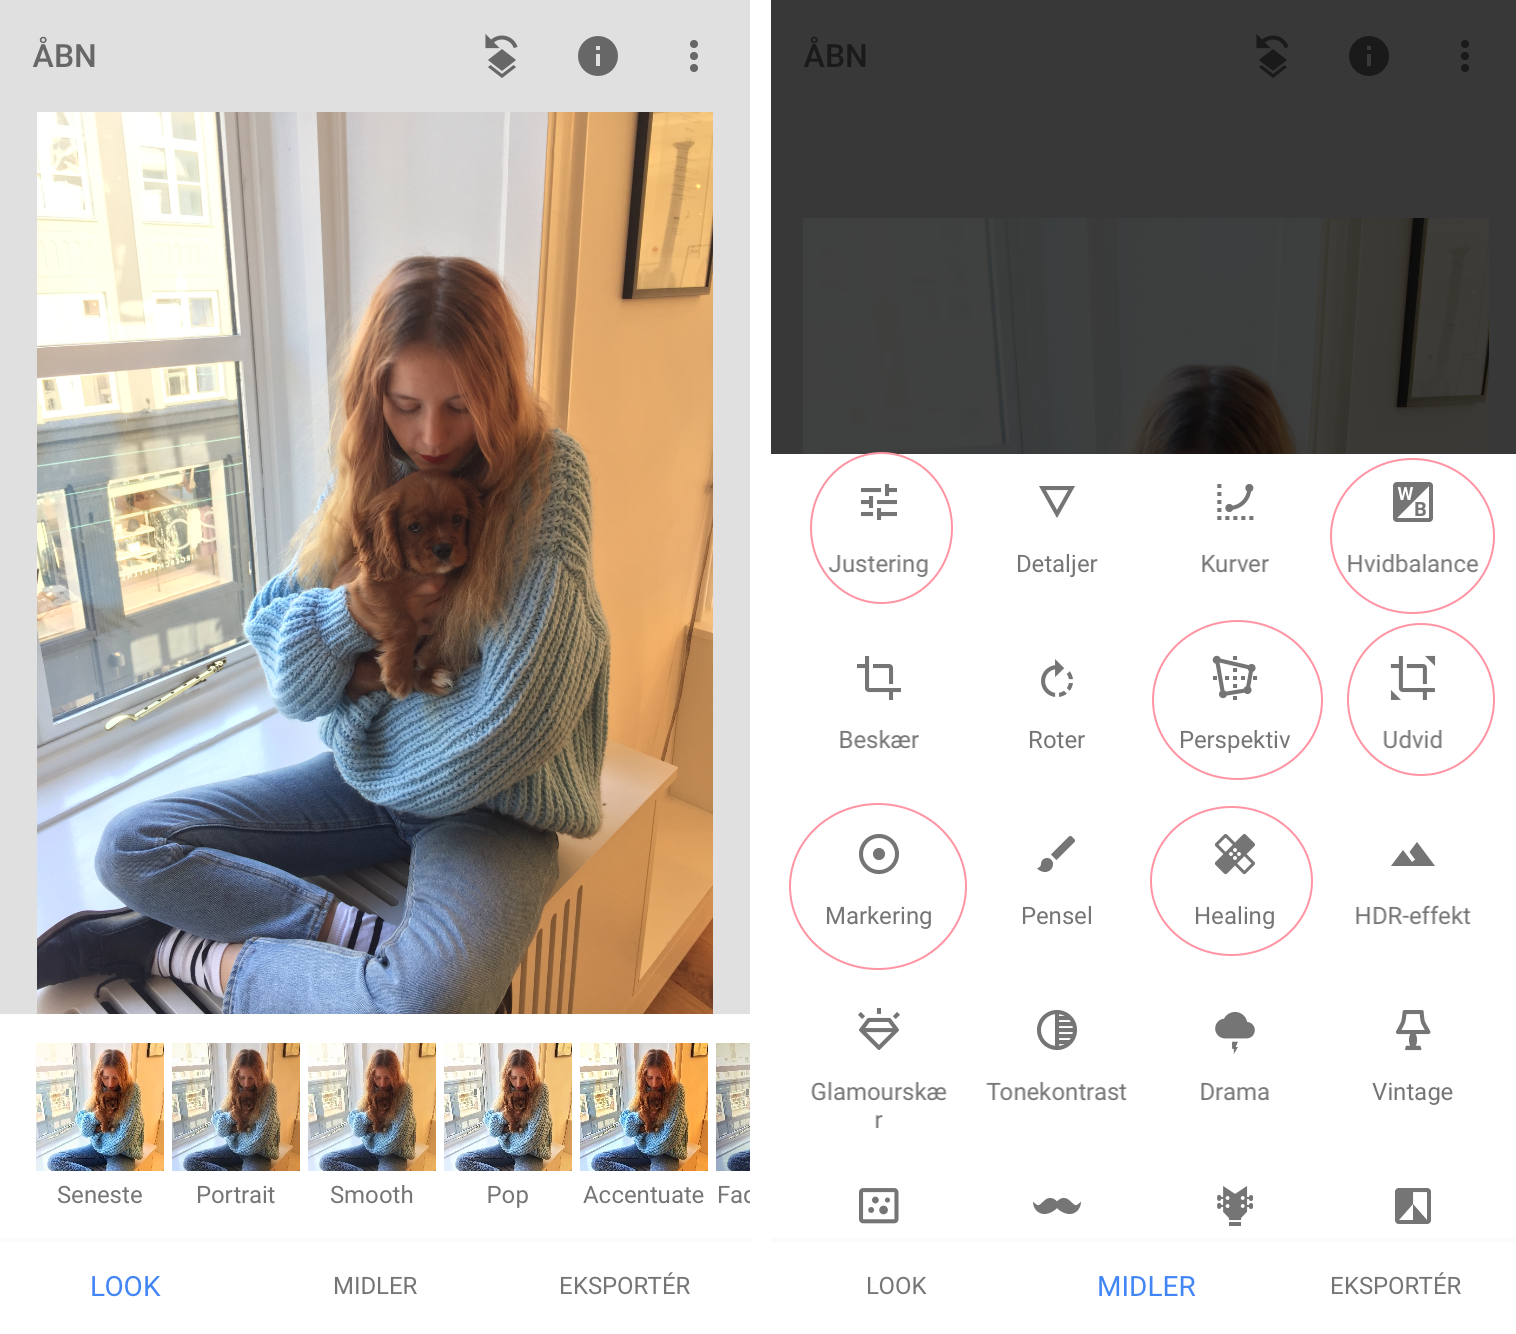
I usually use the different tools(midler), when I edit, since that lets you control everything. You can also pick different looks/filter if you want. In looks, you can also find the way you edited your last photo as the first Look, which is a great way if you want to edit similar photos the same way.
As for the tools, I usually use adjusting, white balance, perspective, expand, marking and healing.
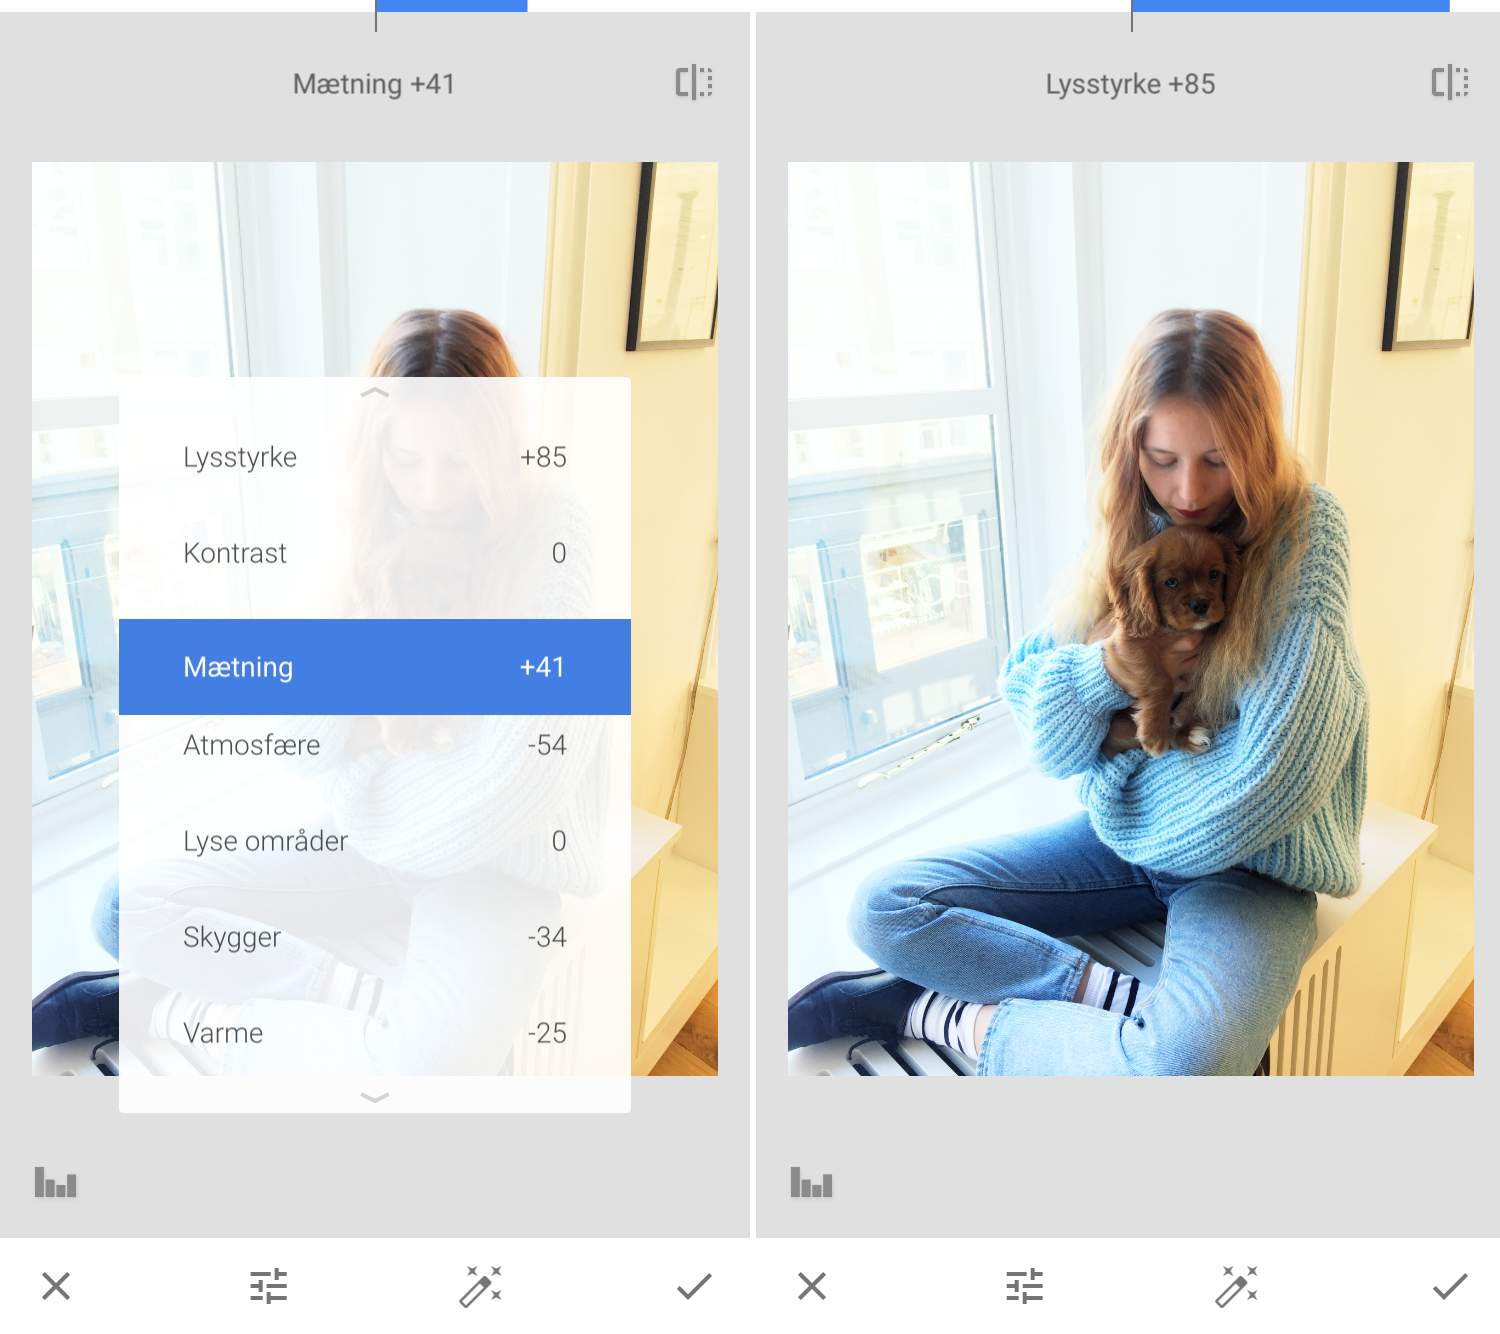 ADJUSTING
The most basic and my most used function in SnapSeed is adjustments, where you adjust basic features like light and coloring. You swipe up and down to pick which adjustment you’ll be using and swipe left and right to then adjust that. I usually light up my pics a whole lot, then make the color tone colder, make the shadows darker to give some contrast, adjust my color saturation and the turn down the atmosphere to give the photo a more romantic feel.
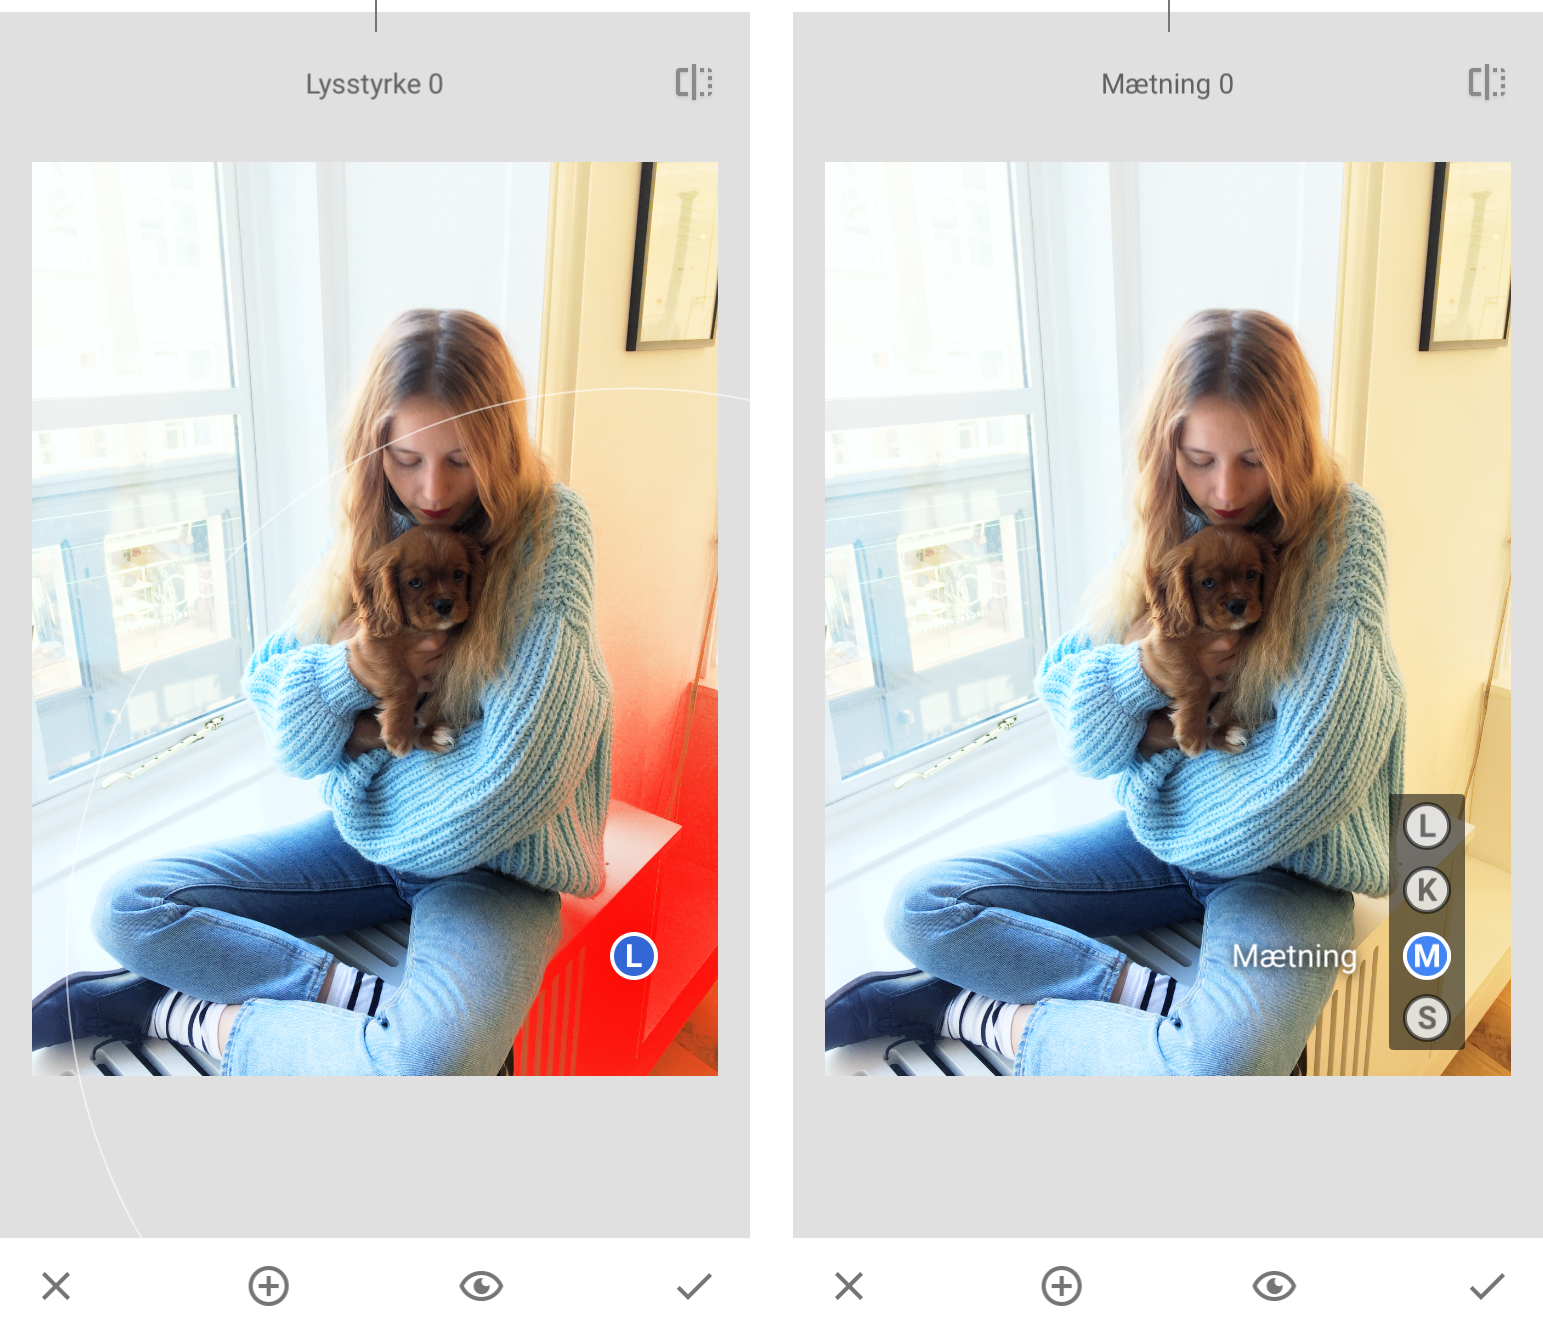 MARKING
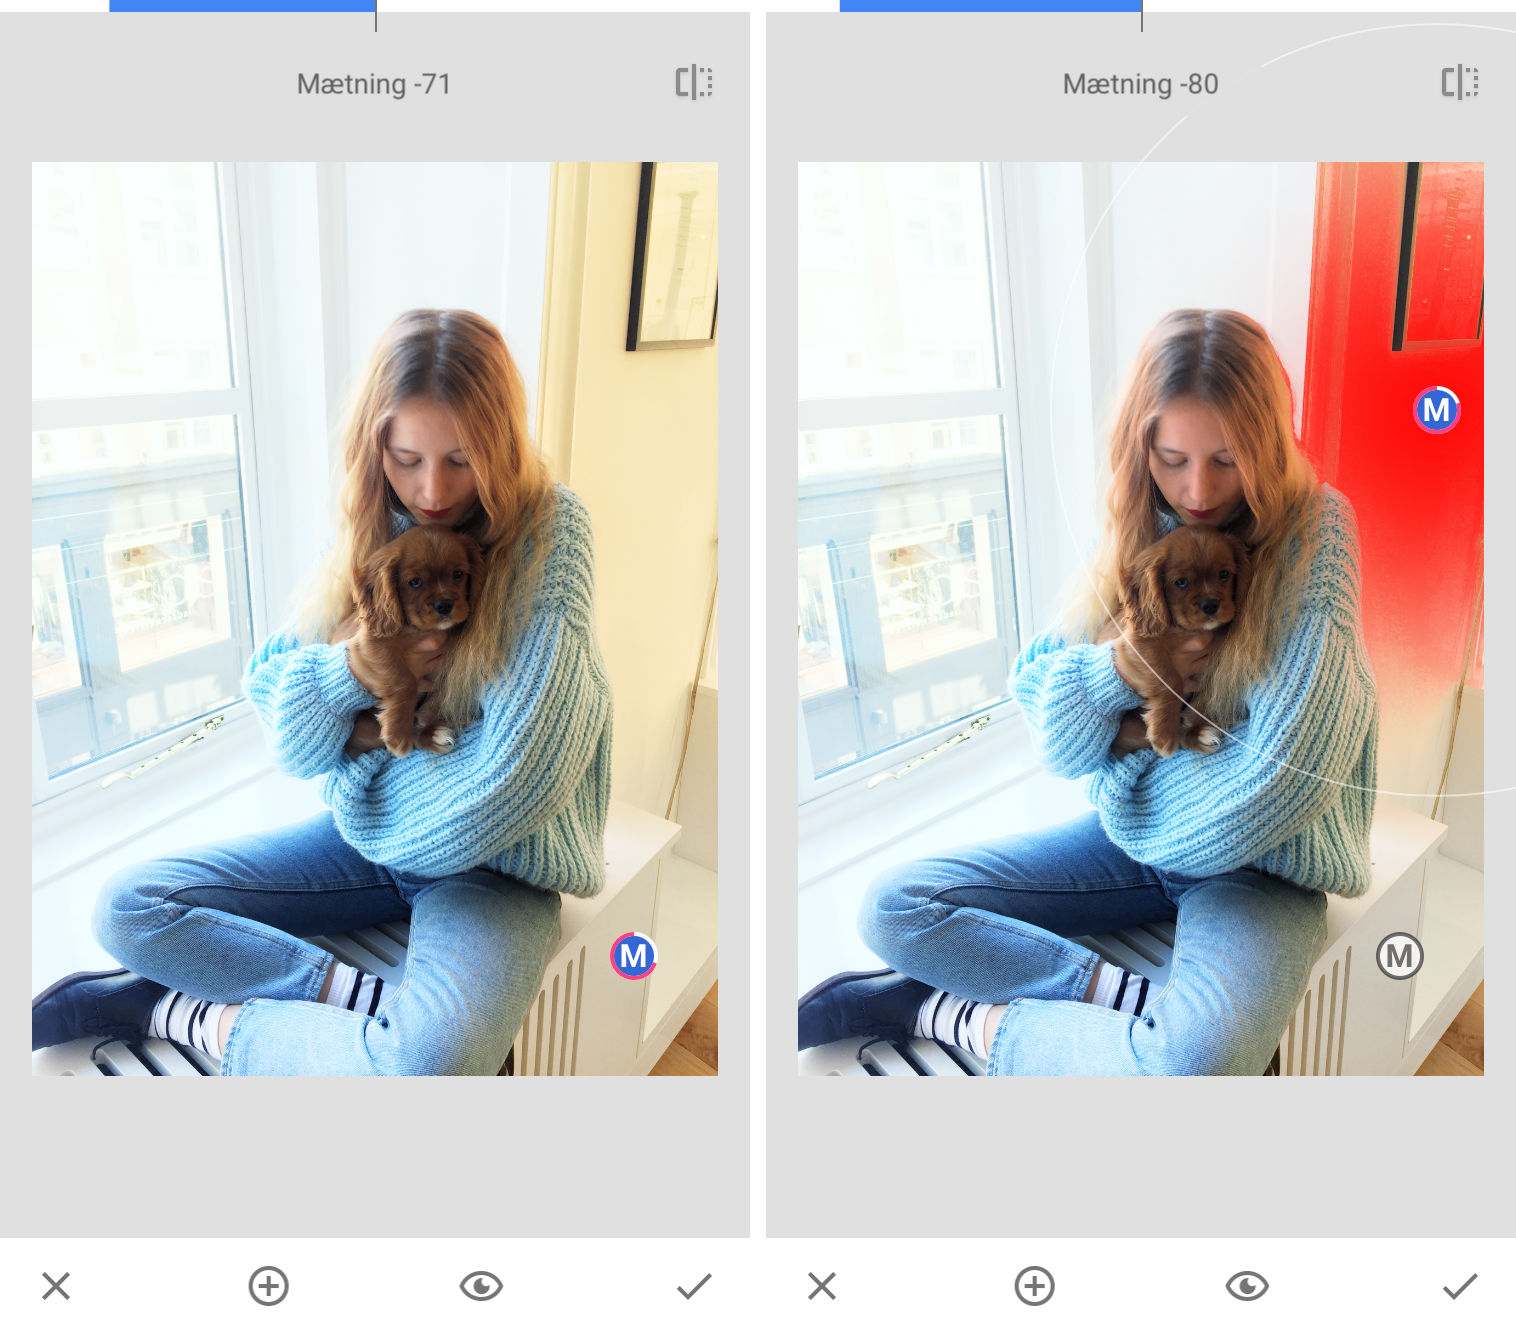
On of my face functions in SnapSeed is the marking tool. You can mark up different areas and then edit the light and saturation of them without touching the rest of the photo. You adjust the marked area with two fingers and then pick what you want to adjust.
Here I’ll be adjusting the yellowy light on the walls, by turning down the saturation of those areas.
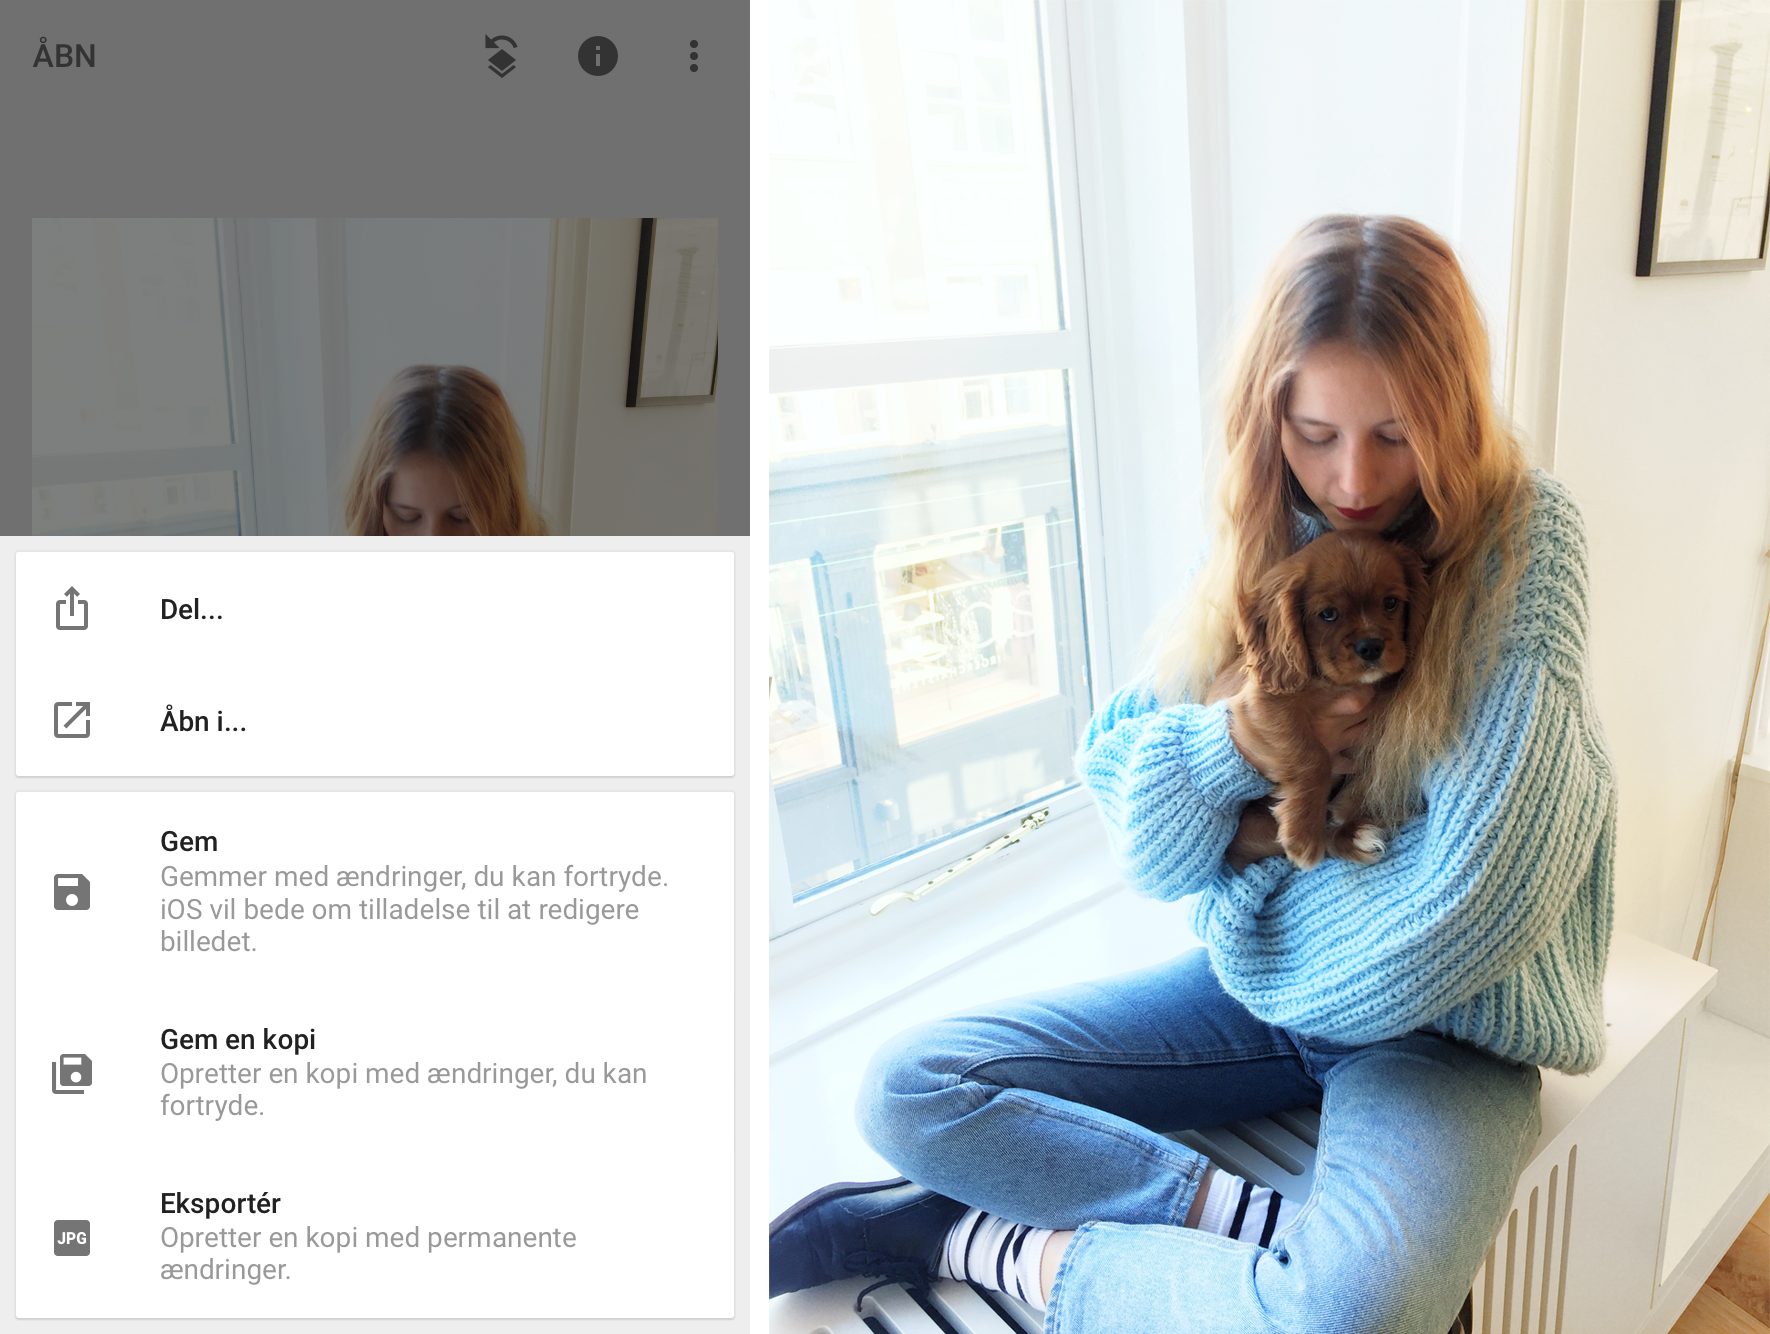
SAVE
Now I like my photo! I tap Export at the bottom right corner and then pick if I wanna overwrite the photo, save a copy or export it.
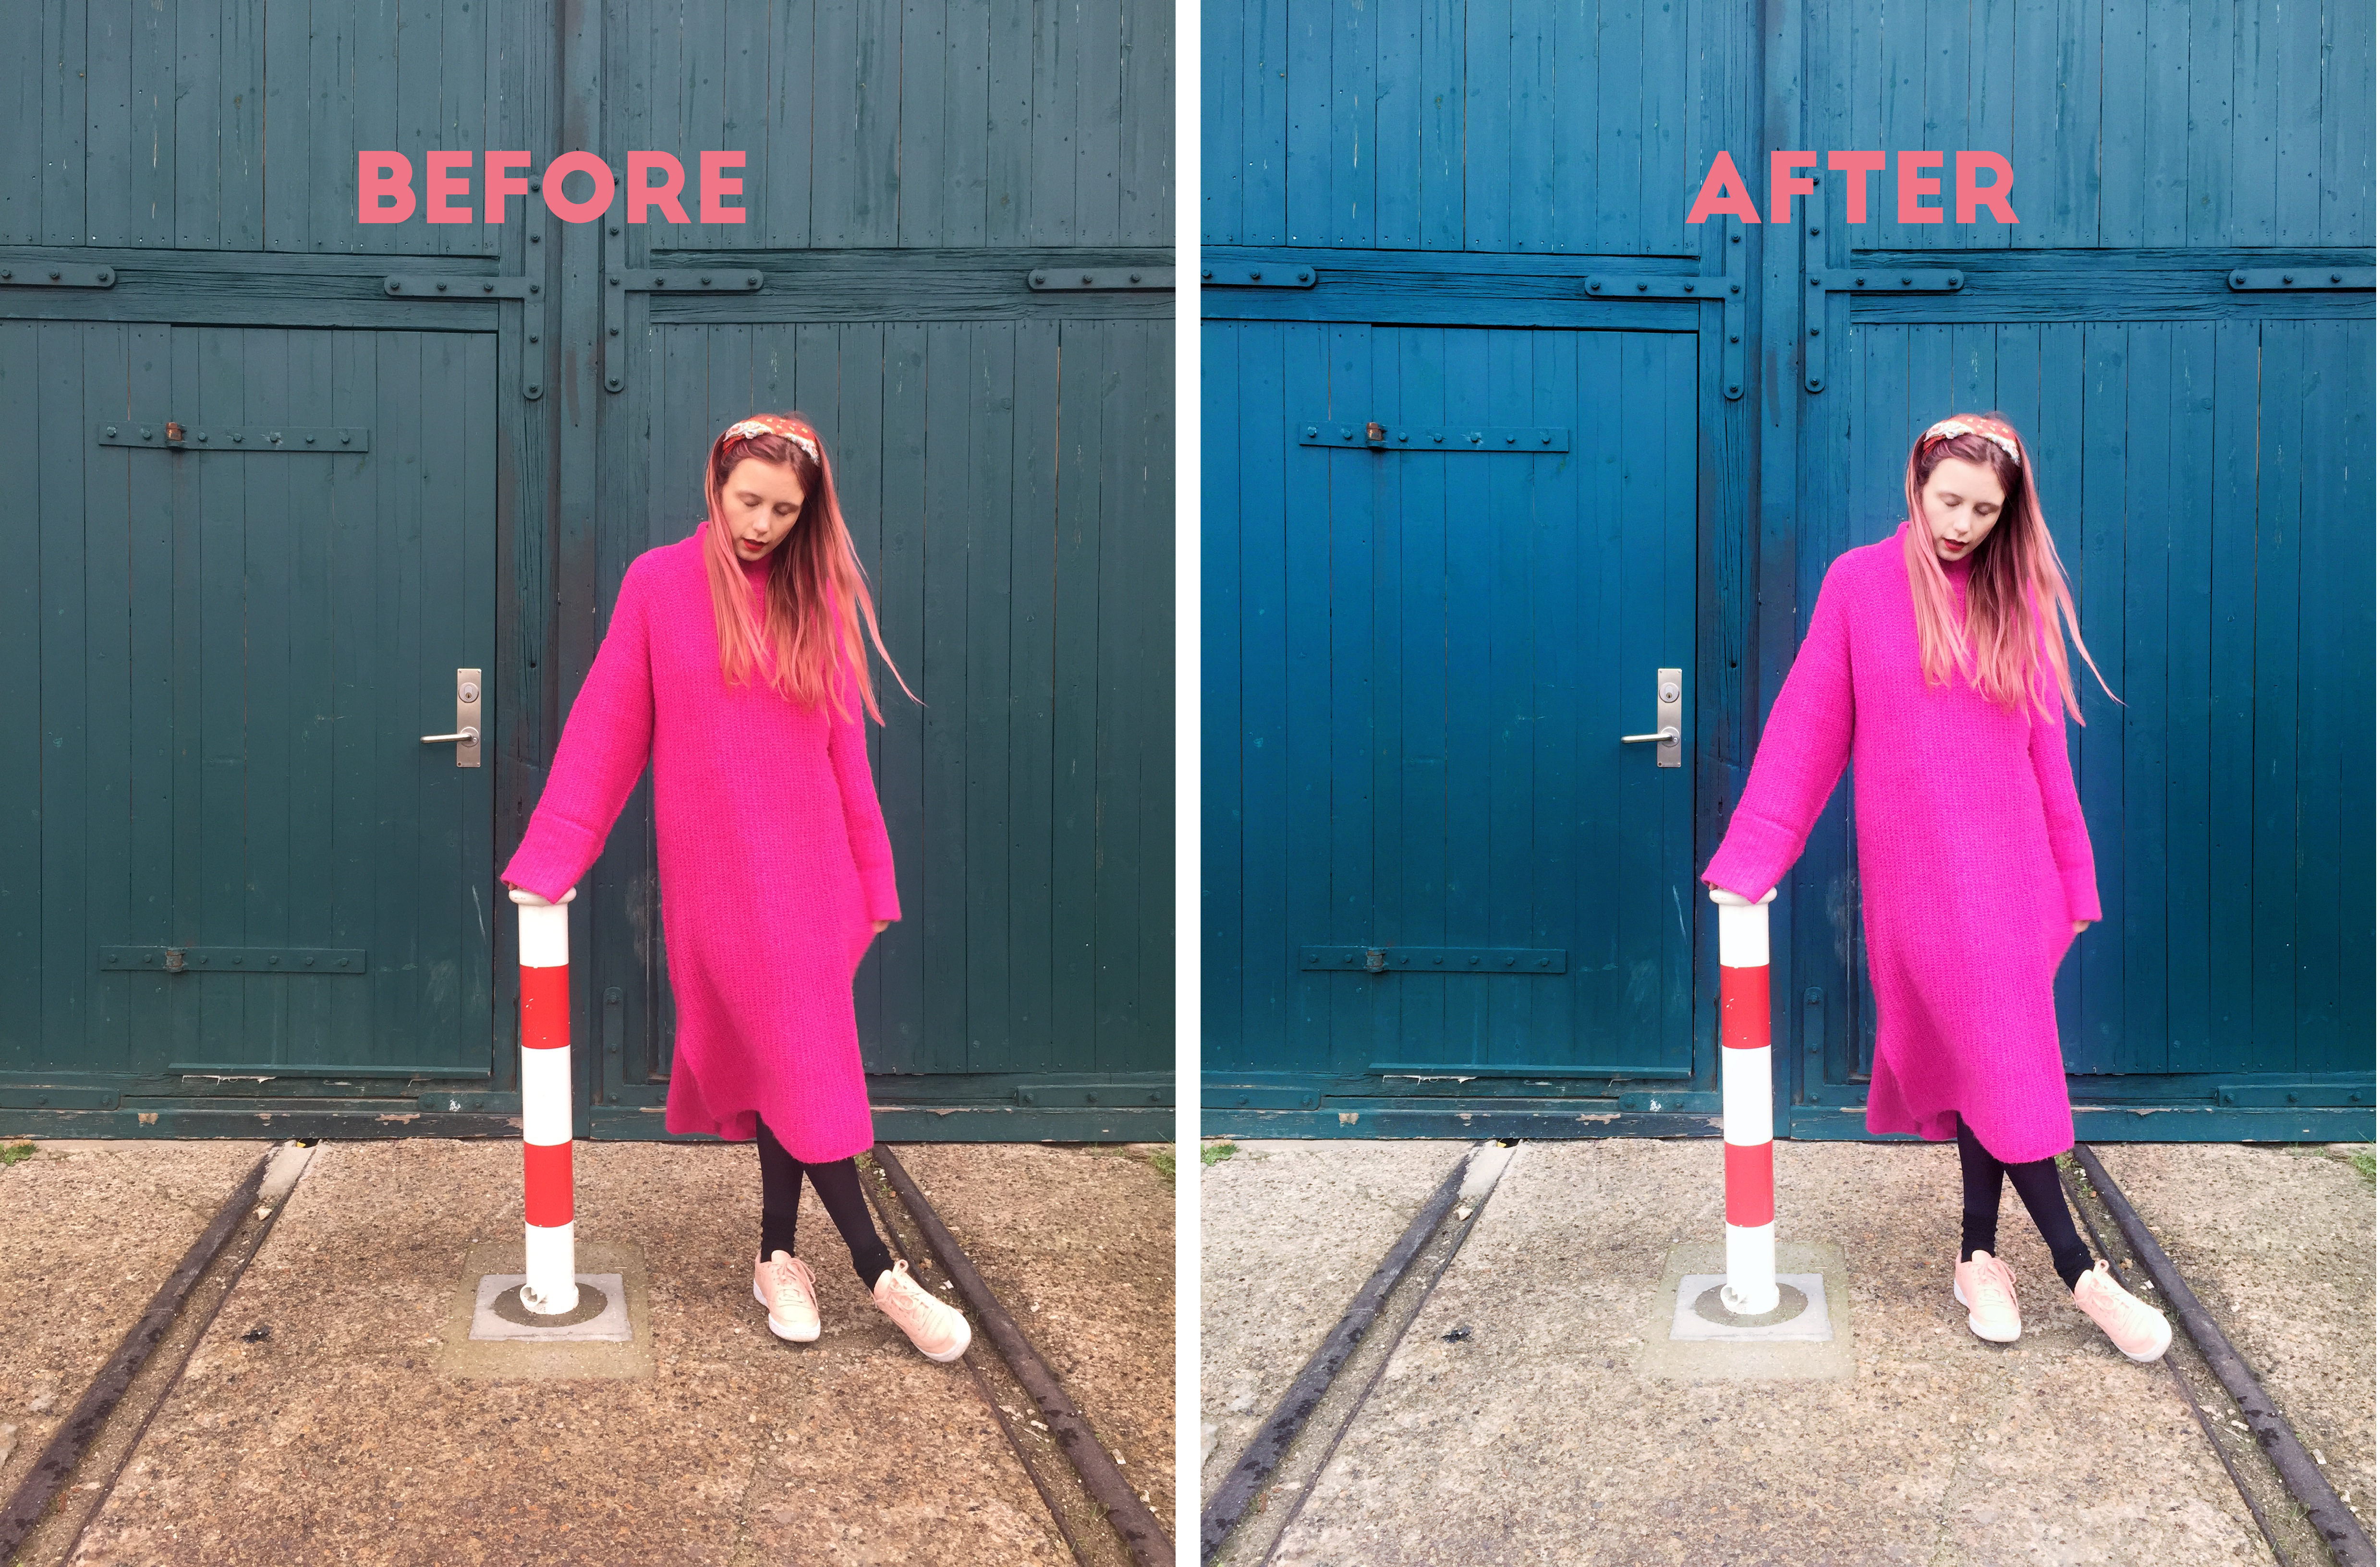
Here’s an other photo, which I edited in the same way that I edited the one above. In this photo, though, I turned up the saturation on the blue wall, to make the colors pop even more.
FINER ADJUSTMENTS
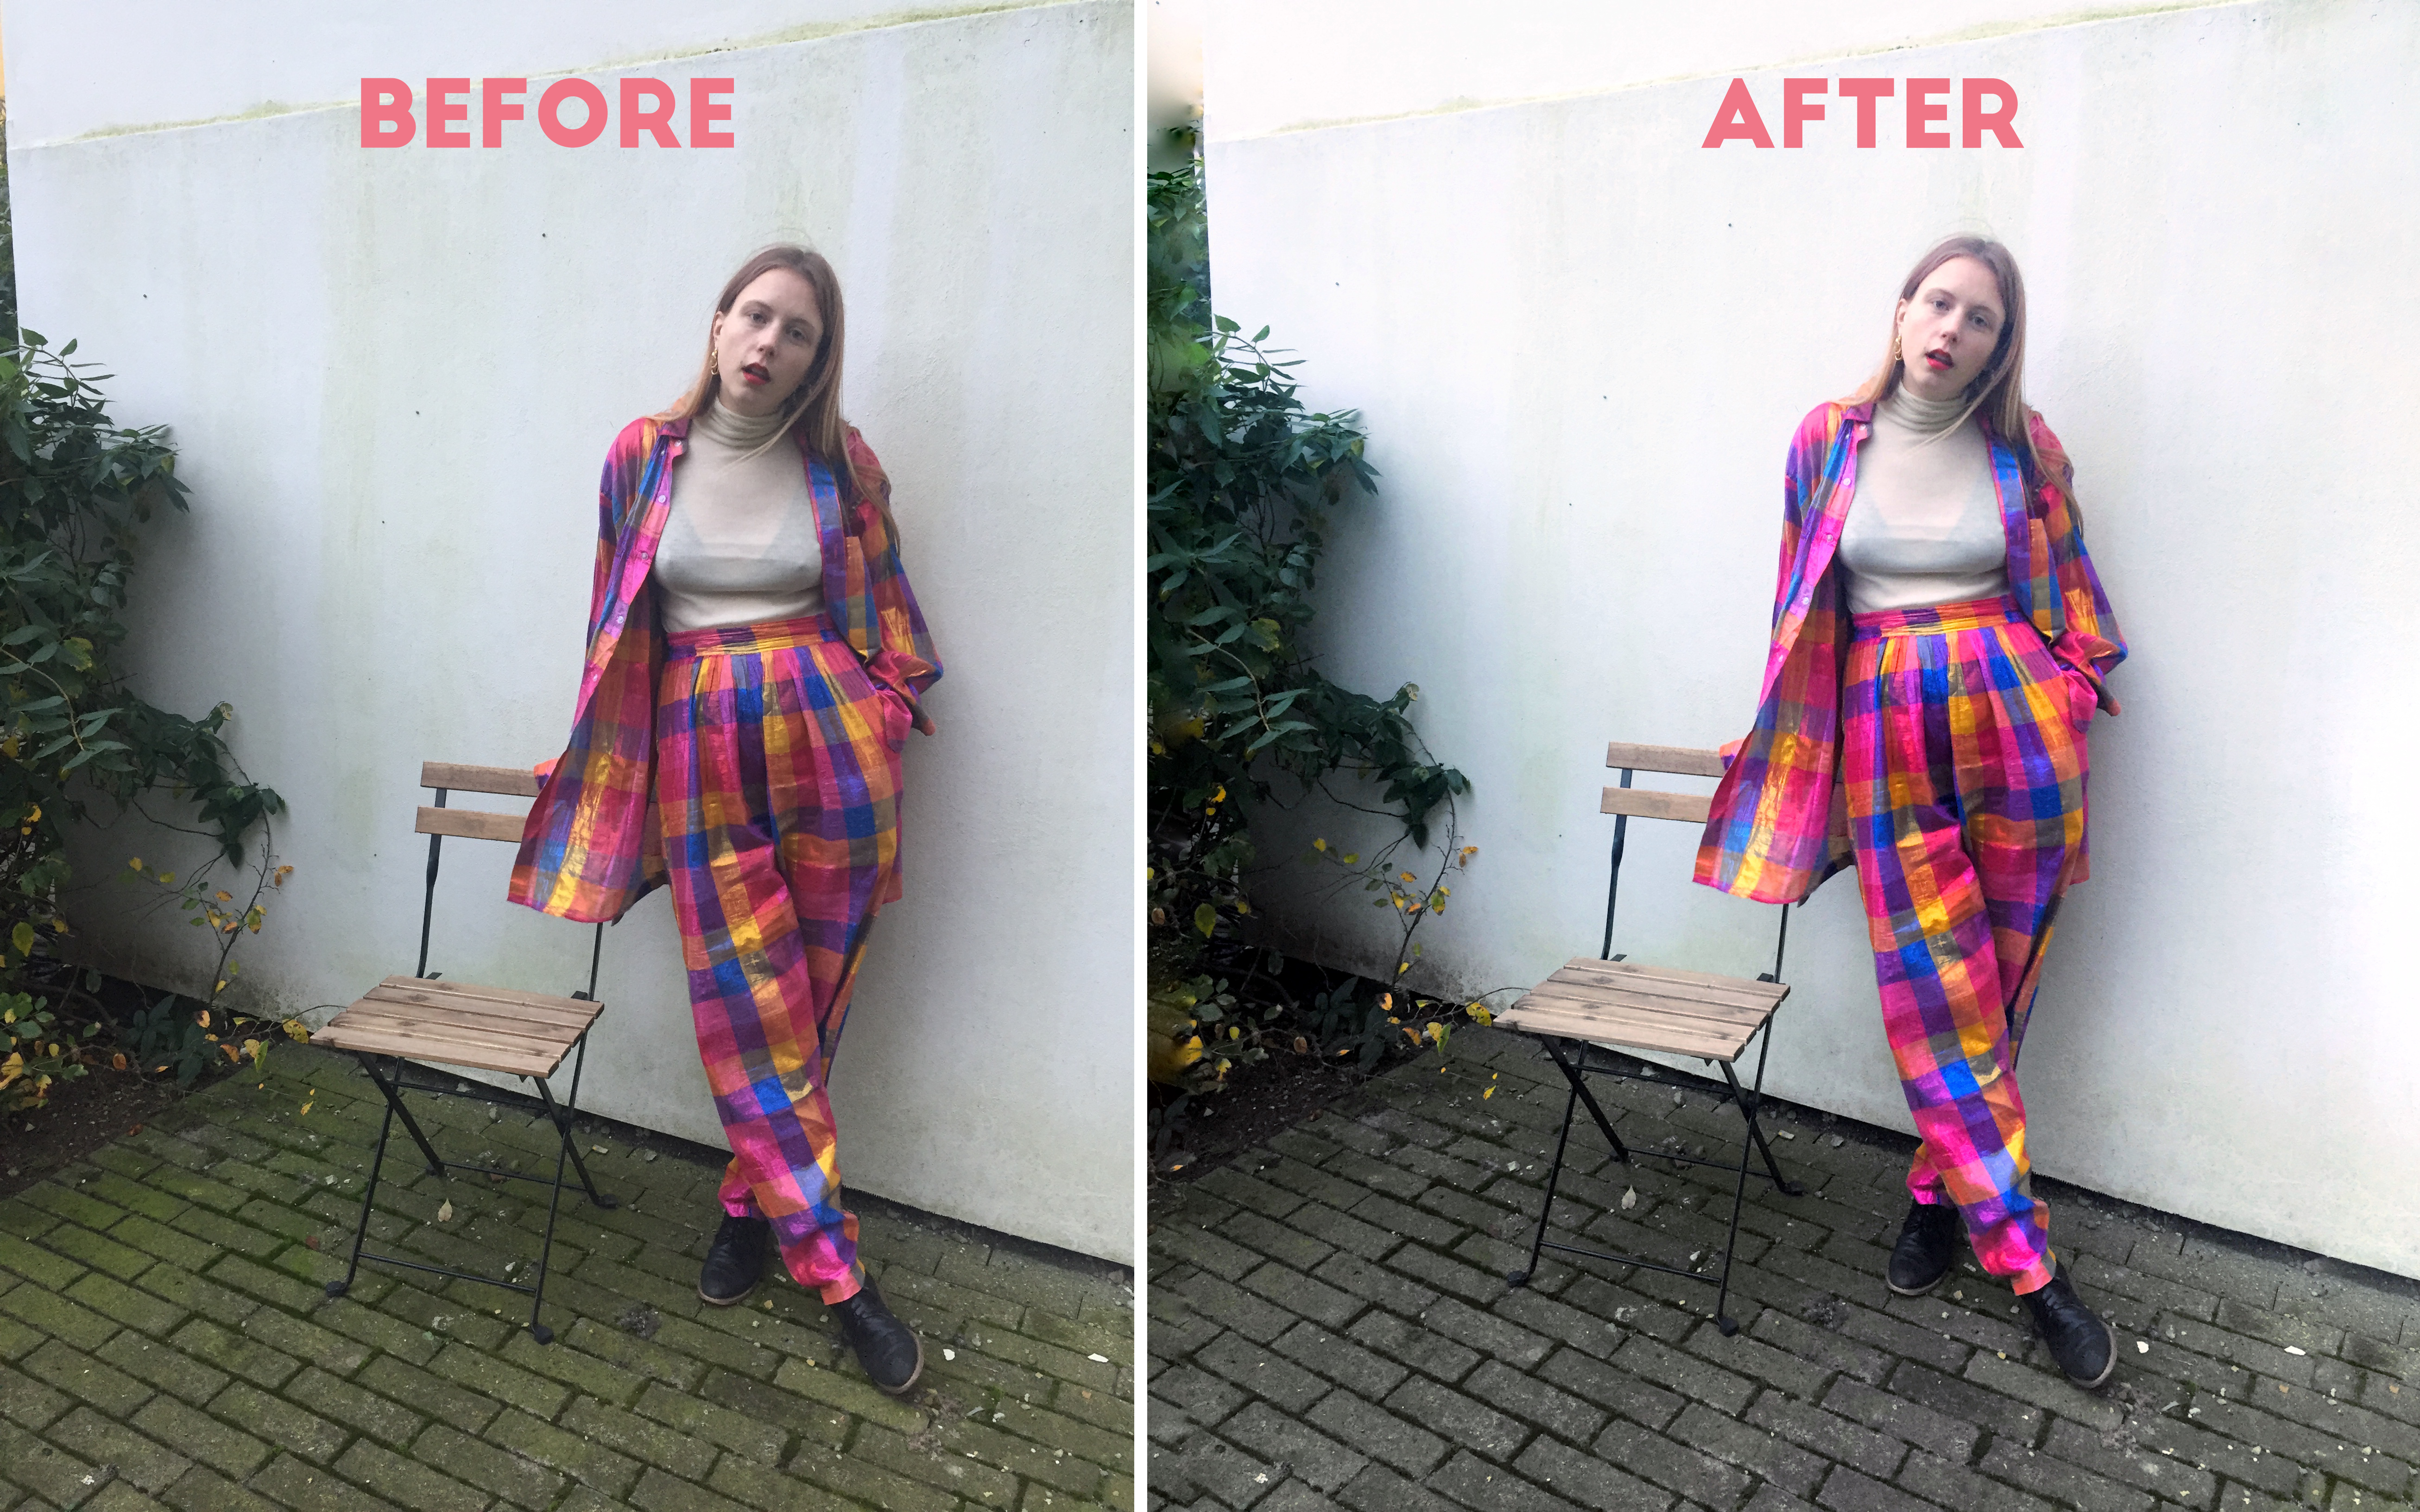
In this photo, I also used the basic adjustments as mentioned in the first photo edit. I also set the white balance, made my freezing nipples a bit less obvious, fixed the perspective and made the photo wider.
 WHITE BALANCE AND HEALING
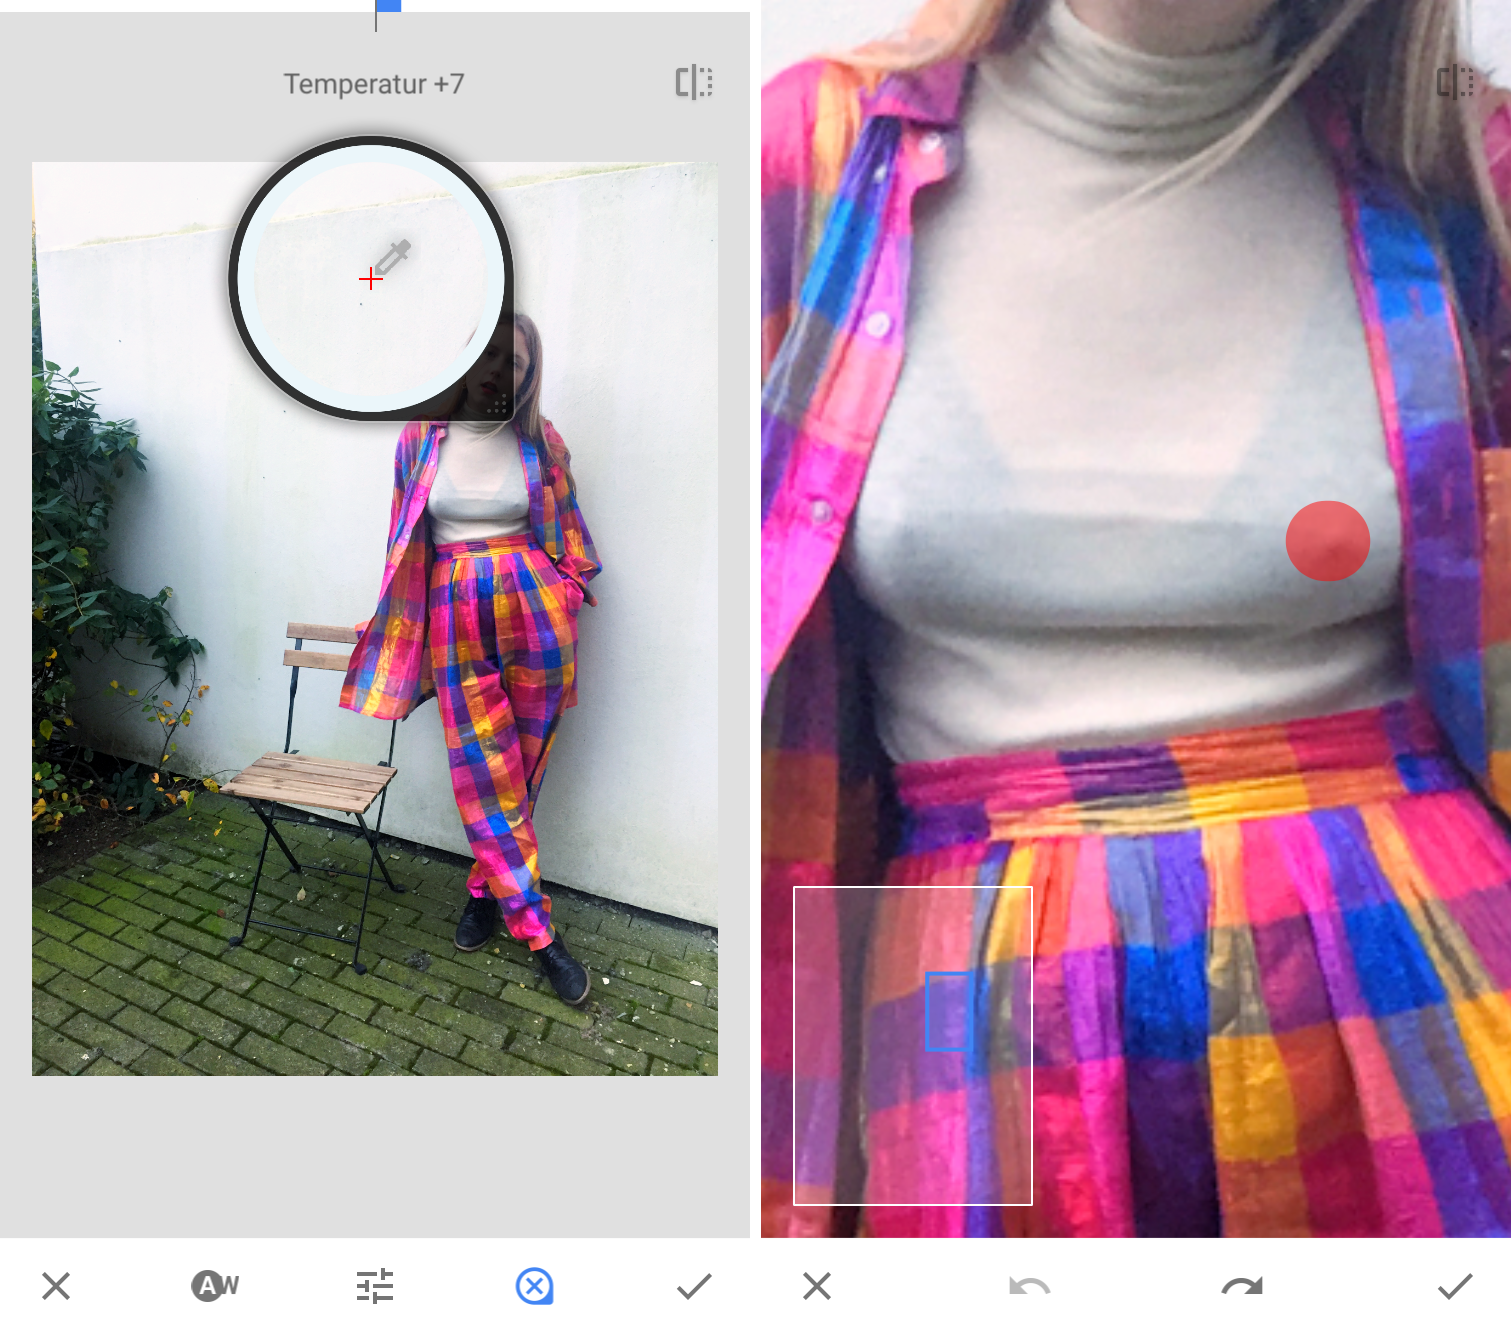
If you wanna get a bit nerdier with the color balance, you can set the white balance of your photo. You pick the little circle with the x in it at the bottom, and then tap somewhere in the photo, where you know that the colors in real life were clear white. The it sets the colors after that.
A different, great feature, which this time went to my boobs, but which I usually use on pimples or weird shadows in the face, is the healing tool. It doesn’t work perfectly every time, but it often does. You just have to zoom in enough for the healing brush to have the right size for what you want to heal/even out, and then tap that spot.
 PERSPECTIVE
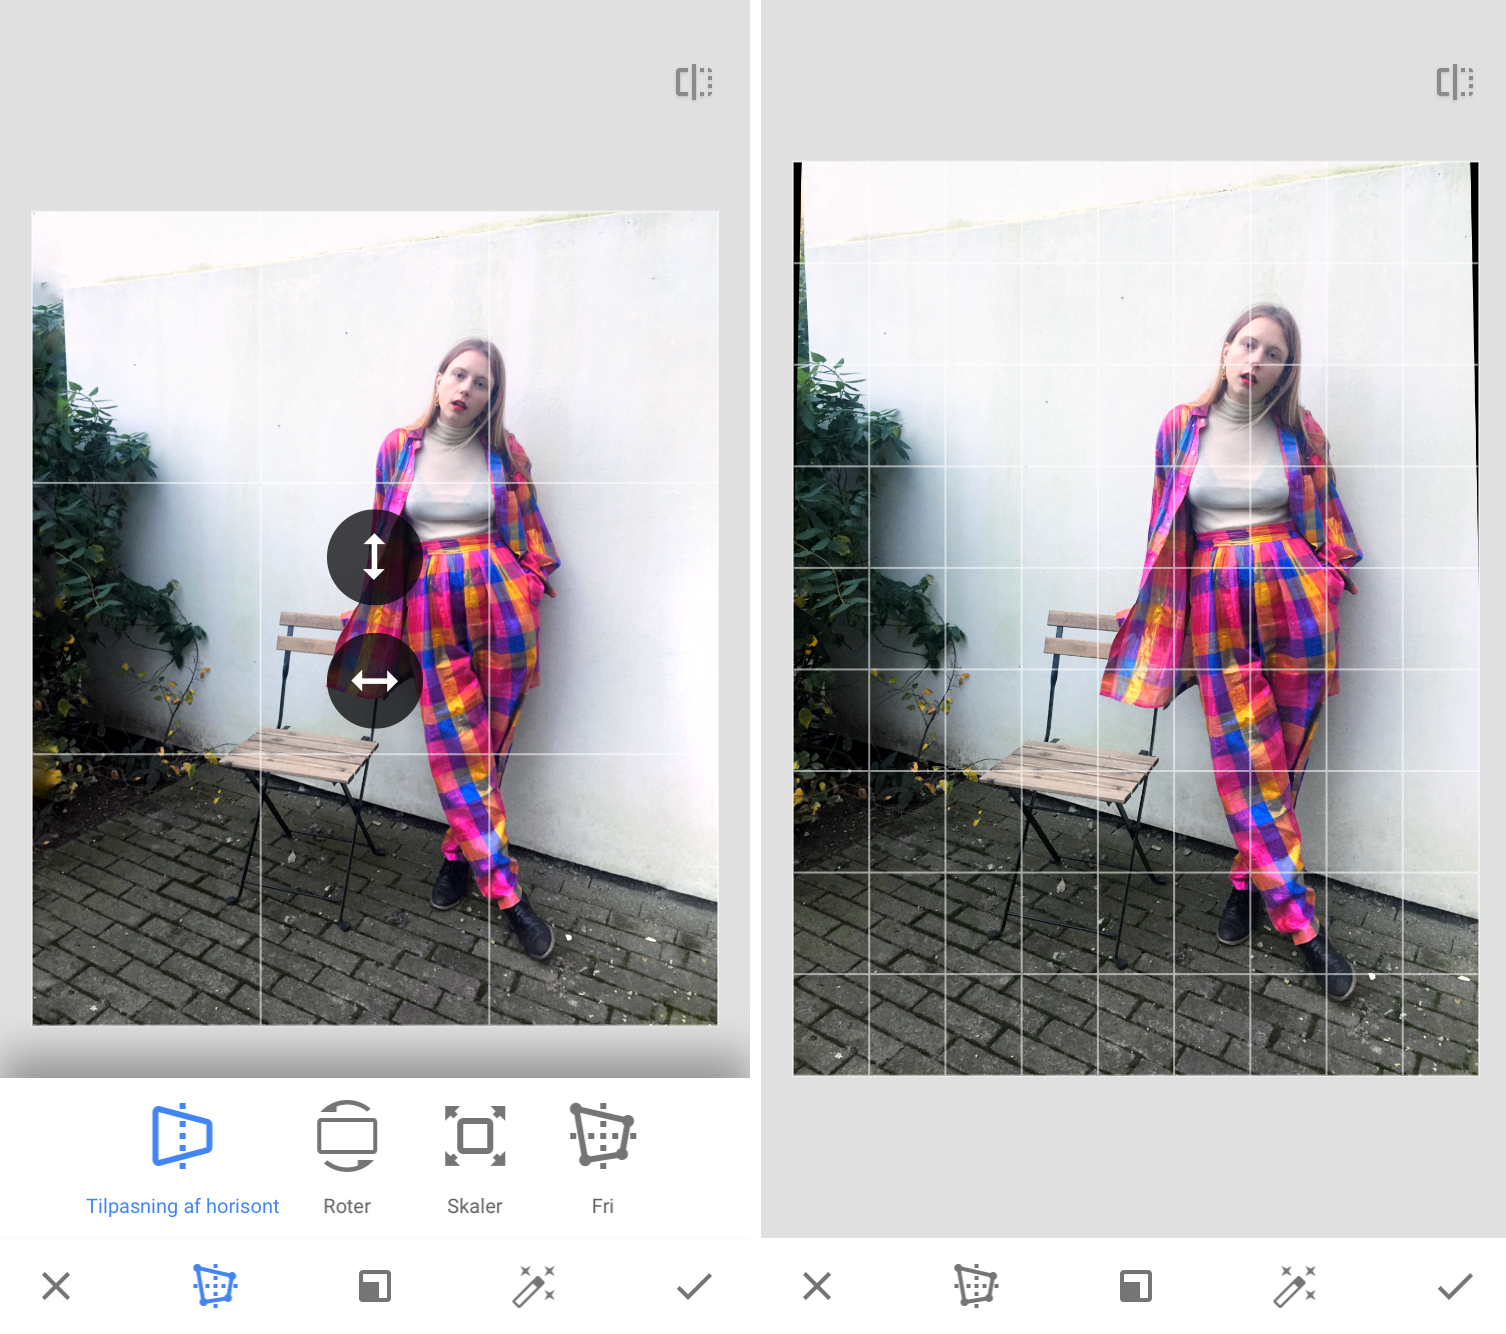
Usually I like it the most, when pictures of people are shot from waist height, but this photo is shot a bit from above. To even out the perspective to how I like it, I just went to perspective and swiped up, down, right and left, until it fit how I wanted it to look. Here you can also rotate the photo if it’s not straight.
EXPAND
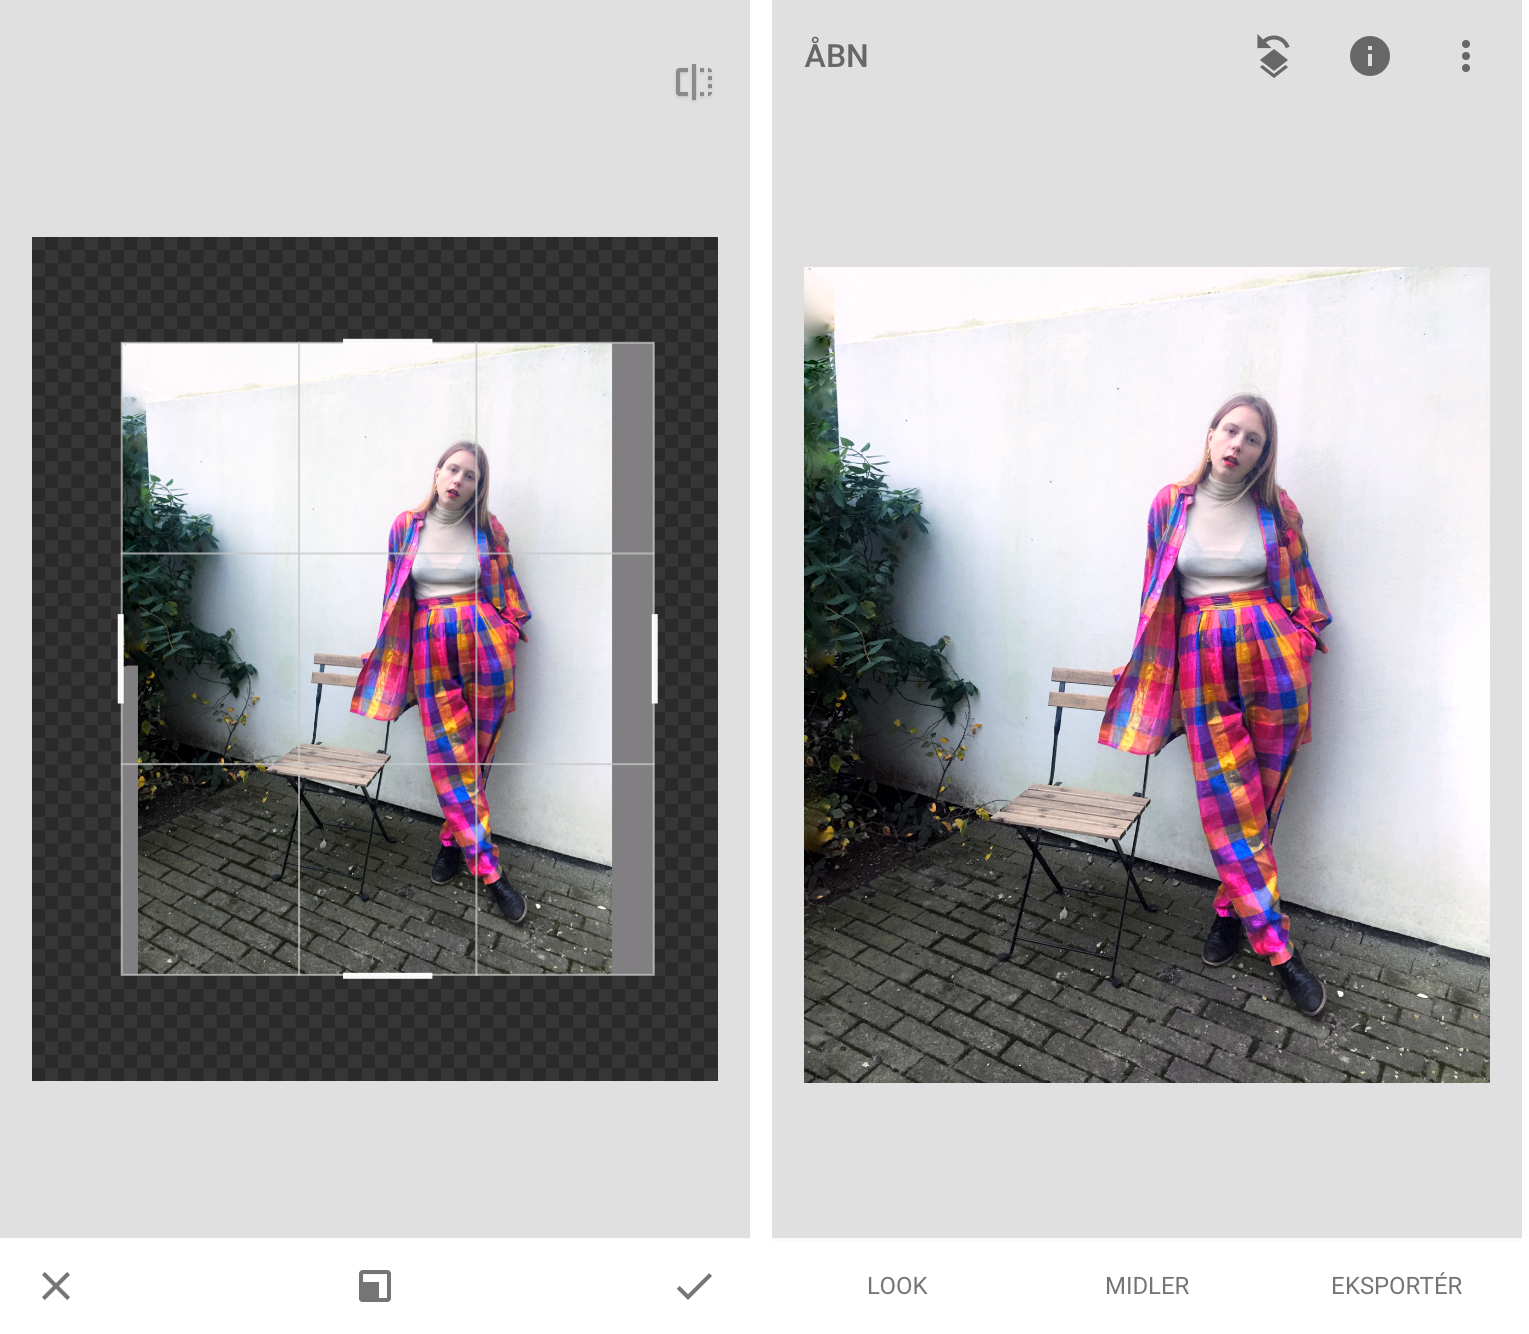
This function is awesome. As most might know, putting a full height standard iPhone photo on Instagram is going to have some of it cropped off at the top or bottom. With this tool, you can expand the photo to fit the Instagram measurements without losing the top or bottom of it. Just pull the photo as wide or tall as you want it, and if the background is basic and even, Snapseed will fill out the new space with what it assumes will work for the photo.
That’s my little guide to SnapSeed photo editing – was it usable? And which apps do you guys use? Don’t hesitate to comment with tips or questions!

