
Recently I learned making GIFs in Photoshop – oh my, it’s so much easier than I thought! You can do it two ways – by using multiple photos to make a sequence or by using a video to make a GIF.
Today we’re looking at making GIFs with photos and soon the video-one will come, too.
Want more Photoshop tips? Check out my previous posts in the series here:
PHOTOSHOP GUIDE: cutout collager
Let’s go! PS! My Photoshop is in Danish, so the Photoshop-terms are translated loosely by me. Check the screenshots to make sure you’re clicking on the right stuff.
1: OPEN YOUR FILES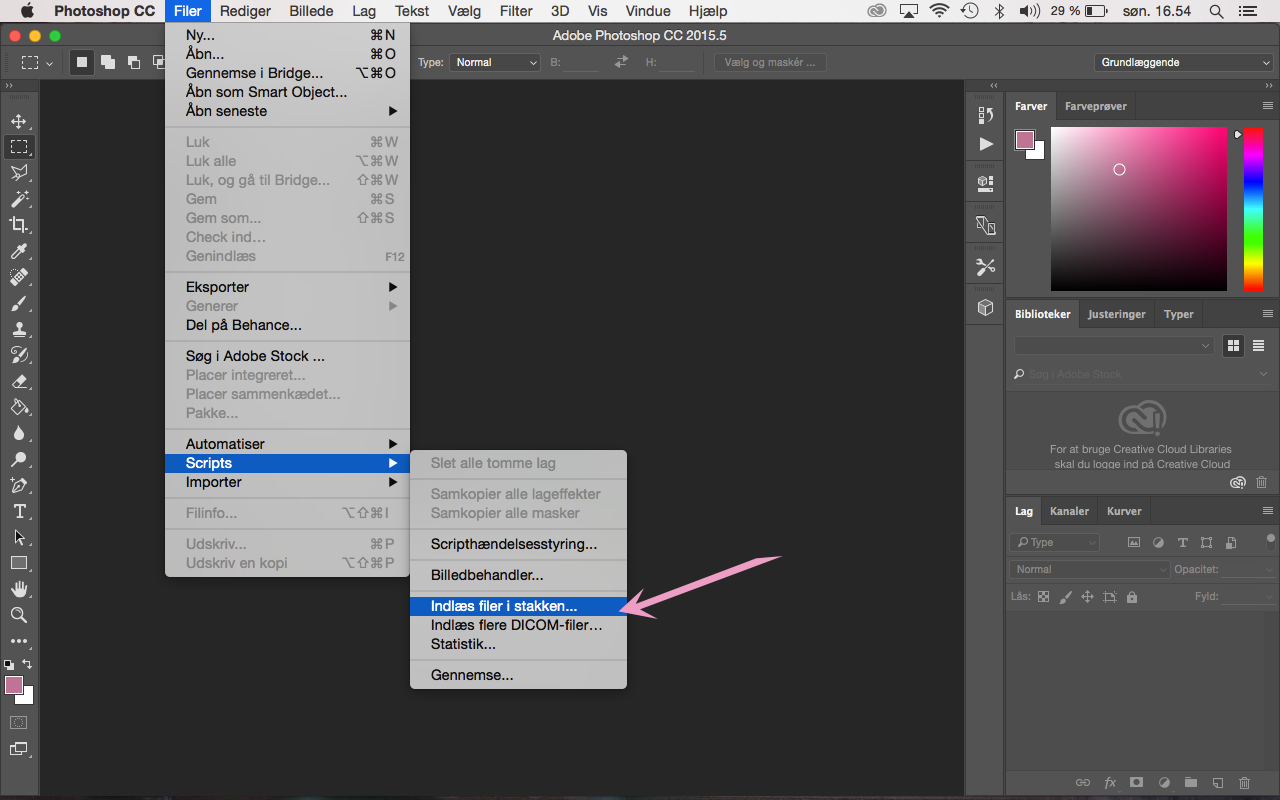
Start by opening the files you’ll be using for your GIF by clicking Files -> Scripts -> Load files to stack
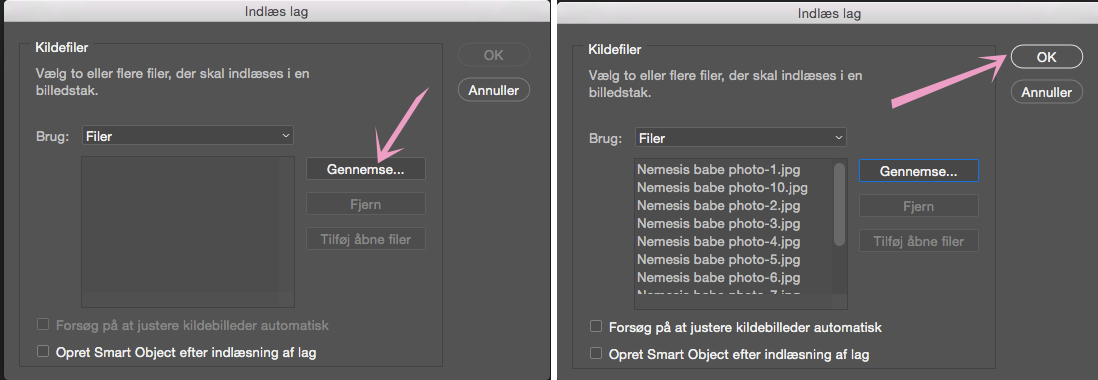
Find your files on the computer. They’re probably not showing up in the right order, so it’s a good idea to name them with numbers on their place in the order. Click OK, once you’ve found them.
2: ORDER OF PHOTOS
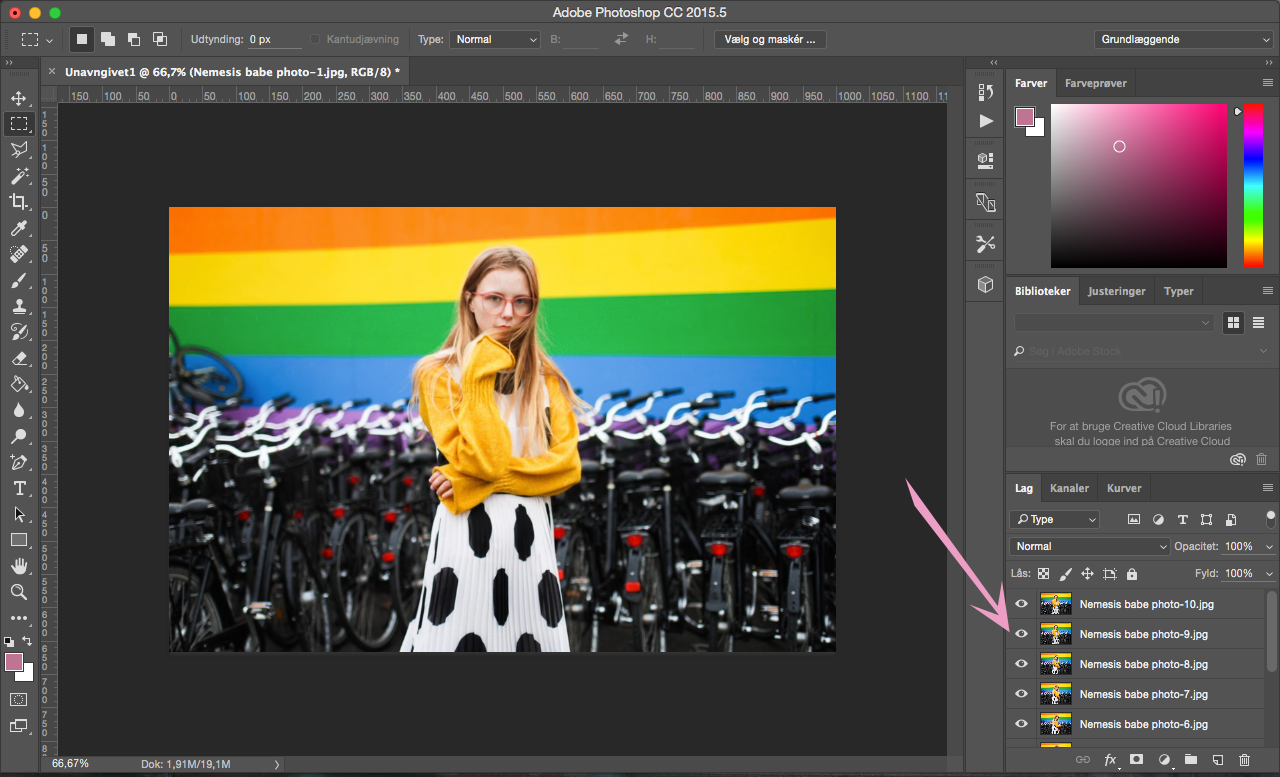
To make things easier, when you put your files into the GIF, arrange them in the order they’re ment to appear. Last photo in order to appear should be the top layer and the first one should be at the bottom.
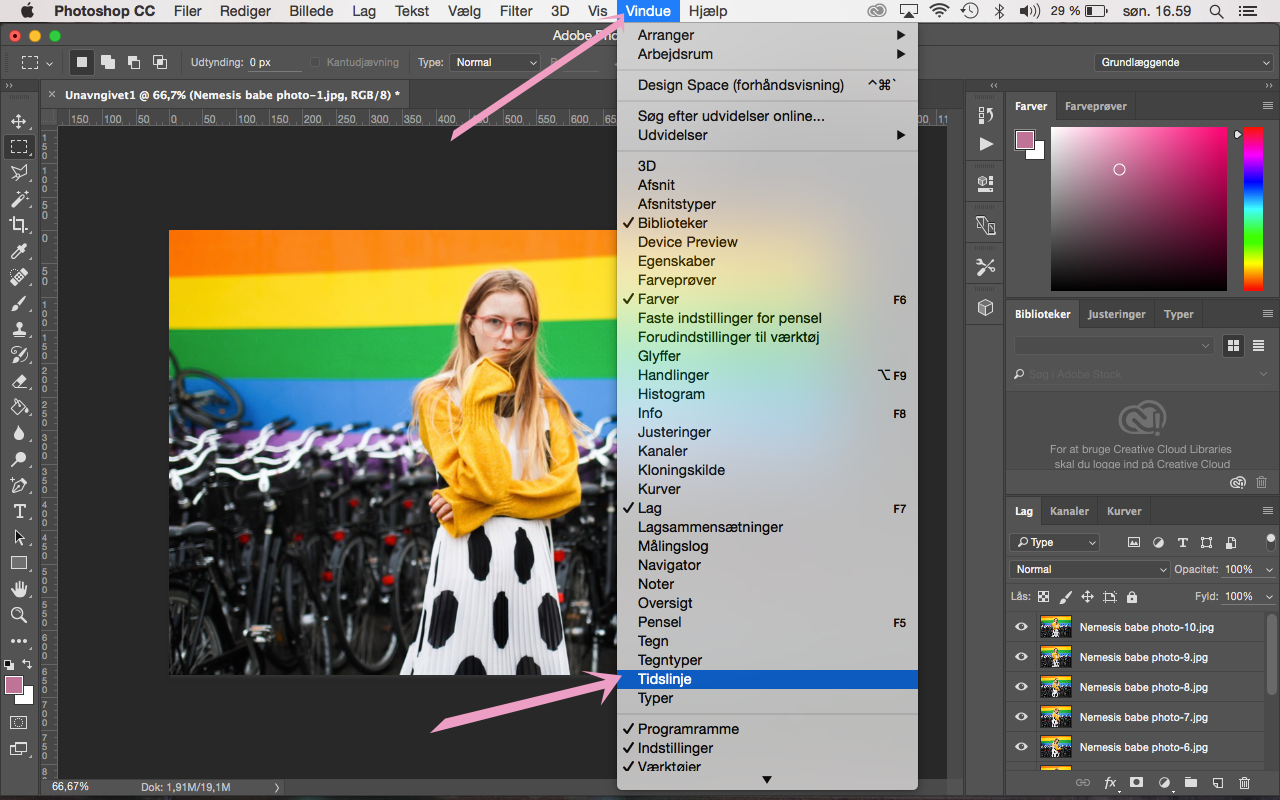
Now open Window -> Timeline. Now the Timeline window appears and you can click on a button in the middle of that window which says something like Make animation. Click there.

Now theres only one photo in your animation. to add the rest, click the three lines in the right top corner of the Timeline-window and click Make images from layers(still, loosely translated).
3: GIF TIME
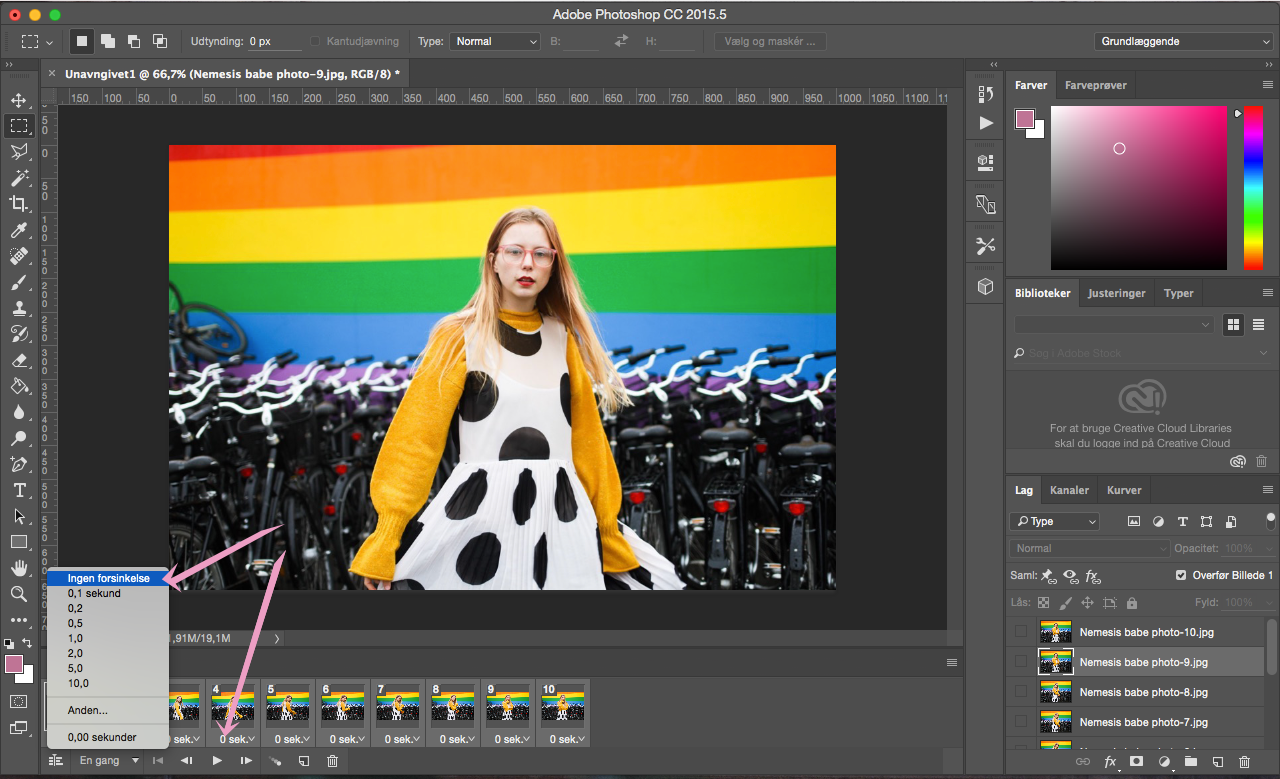
All your photos are now in your animation and you can choose the speed at which it should be played. For GIFs like the one in this post, I’d choose no delay/0 seconds. Mark all your photos by clicking the first one, holding down shift and clicking the last one. Now click the place that says x seconds and choose speed from the menu.
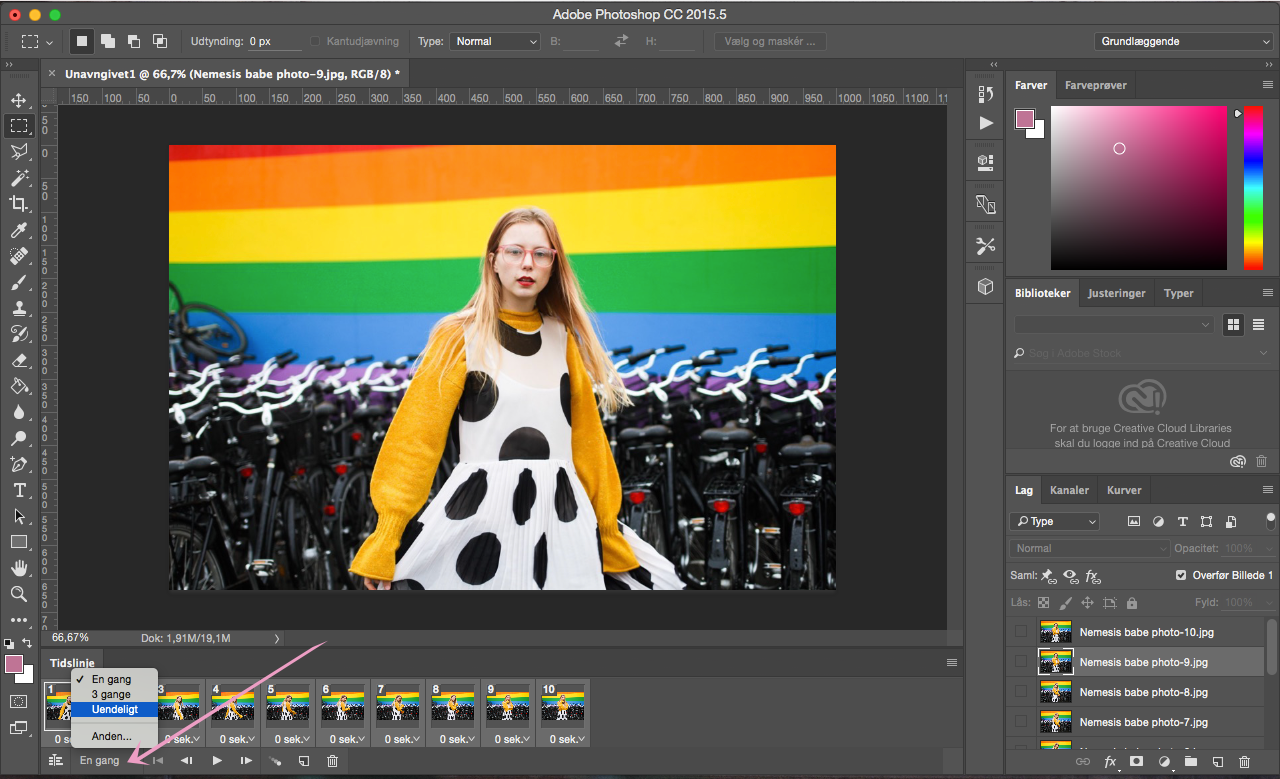
You can also choose the amount of times your GIF should be played below the Timeline. I usually pick infinitely.
4: EKSPORT THE FILE
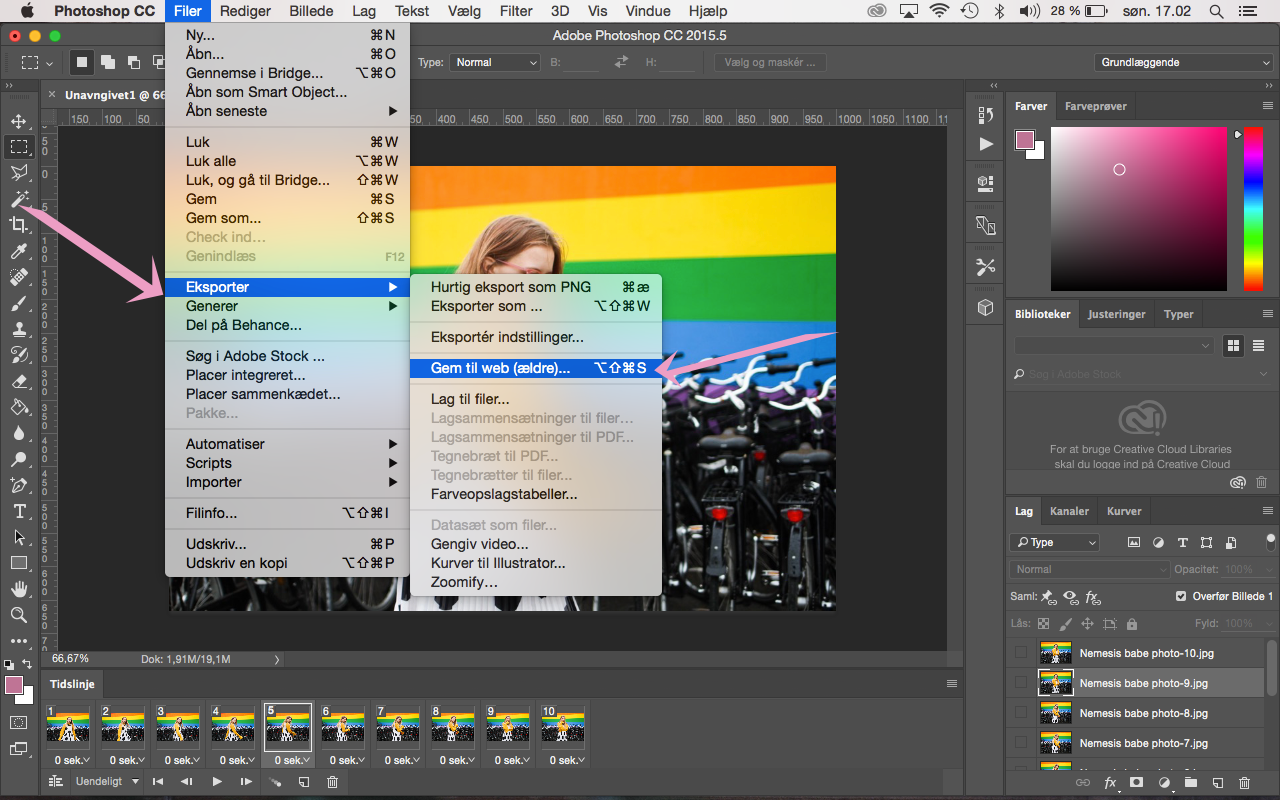
Now I’m happy and I wanna save my GIF. I do that by clicking Files -> Eksport -> Save for web.
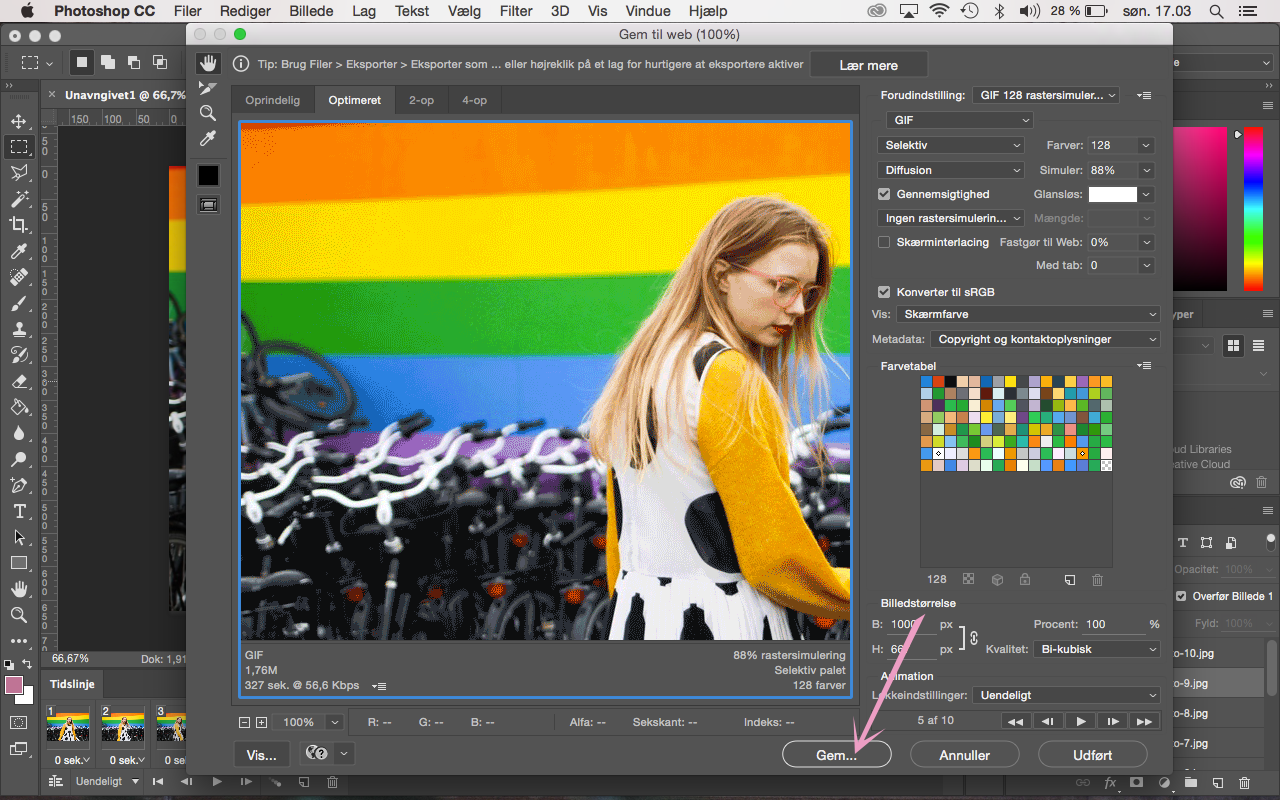
A window appears with the properties of my file. Here I sometimes change the size of the file but otherwise I just go straight to Save.
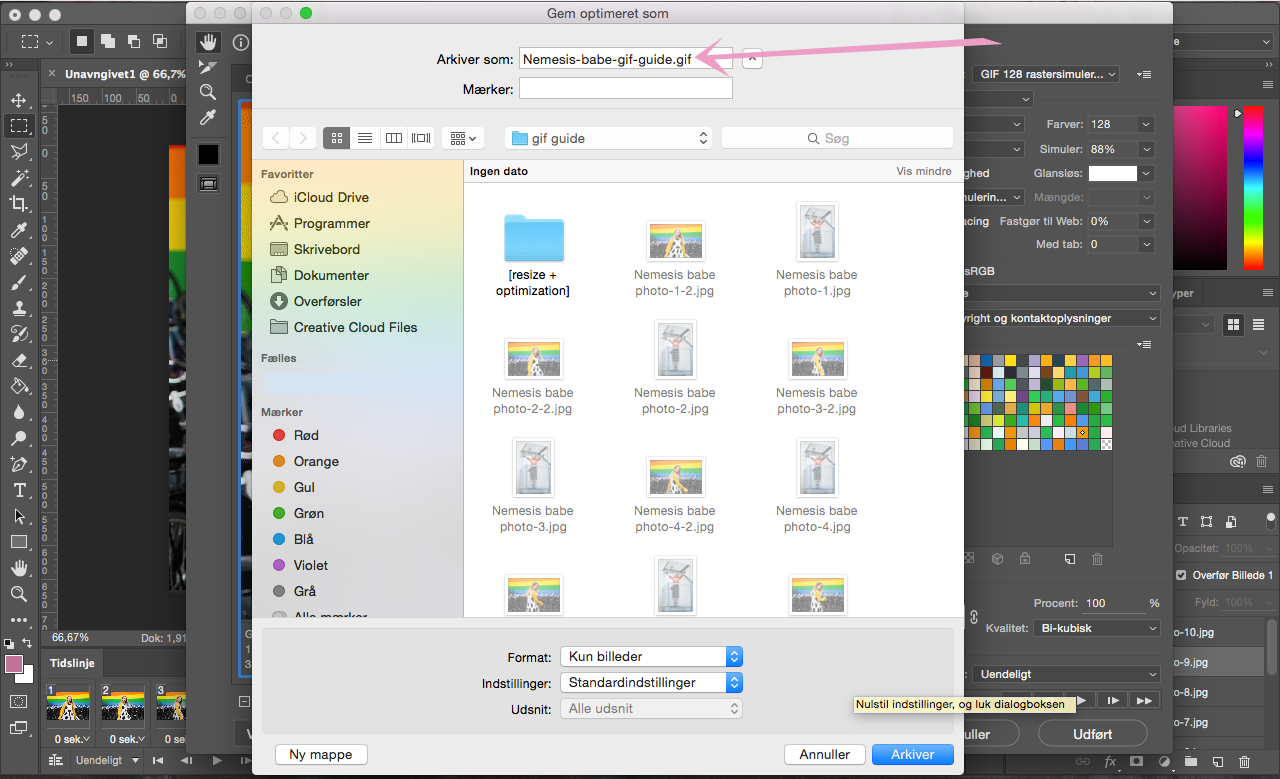
It’s important to keep an eye on saving the file with the right filename. Check that your file has the ending .gif !
You can’t play your GIF-file on the computer, but once you upload it to the internet, it should be going.