
Ok, prepare for a looong post – it’s time for the last part of photo school and this class is a quick guide to simple editing in the paid program Adobe Lightroom, which I use the most when editing my photos. I’ll be taking you through the functions that I use the most when I edit my photos for the blog – on the pictures below, the functions used are highlighted with red and the explanation is below the photo. If you want to know more about Lightroom and what it can do, spending time finding guides on Youtube is very useful – because there is tons more stuff to know about the program than what I’m showing you here!
But let’s go, right? Ready, set, Lightroom!
1: PICK OUT YOUR PHOTOS (CLICK THE PICTURE FOR A BIGGER VERSION)When coming home with a great big bunch of photos, its quite annoying having to scroll back and forward between them to find the ones that you want to use and then edit them amongst all of the other photos. In Lightroom, you can press P on your keyboard everytime you find a photo that you want to use, when browsing through your photos. This gives the photo a little flag in the corner and when you pick the filter “Flagged” in the filter drop down-menu on the right, the only photos left are your flagged ones.
2: MAKE YOUR SHOT LOOK BETTER
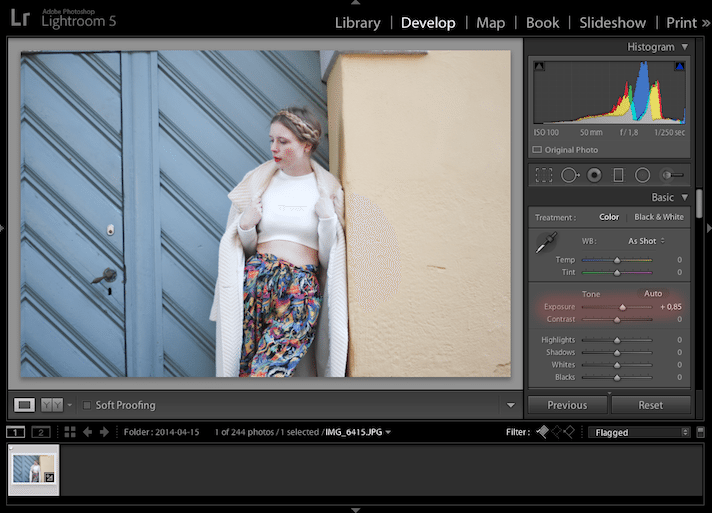
I usually begin with messing with the exposure, the light, of the photo on the exposure slider in the side bar, where all of the editing and manipulation functions can be found. Sliding it right, makes the photo lighter, sliding it left makes it darker.
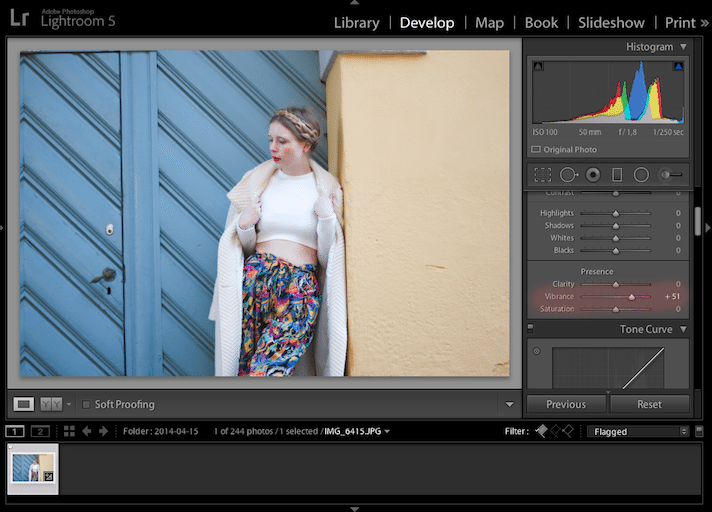 Then I add some more vibrance to the colors of my photo by pulling the “Vibrance”-slider right.
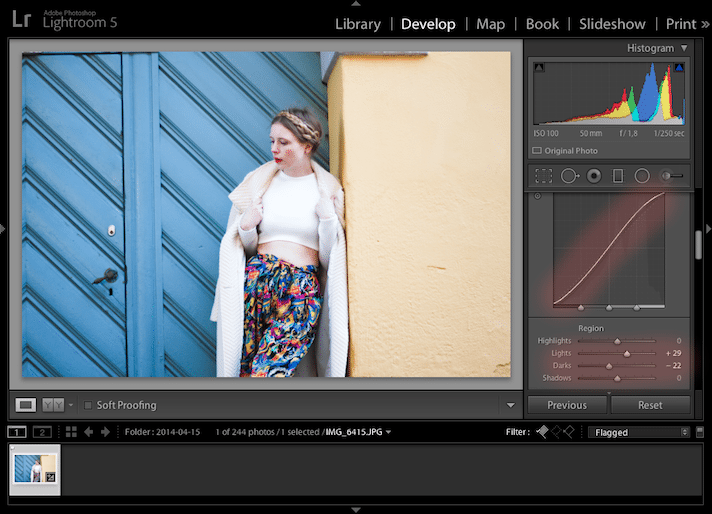 After this, I go to the curve-diagram which can be found when you scroll down a bit in the sidebar, the same function I used and explained in the GiMP-guide. Here I pull the “Lights” slider and the “Darks” slider so that my photo becomes a bit clearer and more contrasty.
 If there are colors in the photo that I want to be more or less prominent, I go to the “HSL/Color/B&W”-function further down then sidebar. Here I click on the color I want to mess with and turn up the saturation and luminance – here for the yellow color – to make it brighter. On the “Hue” slider, you can edit the tone of the color, but I like my yellow as it is, so I keep it at 0.
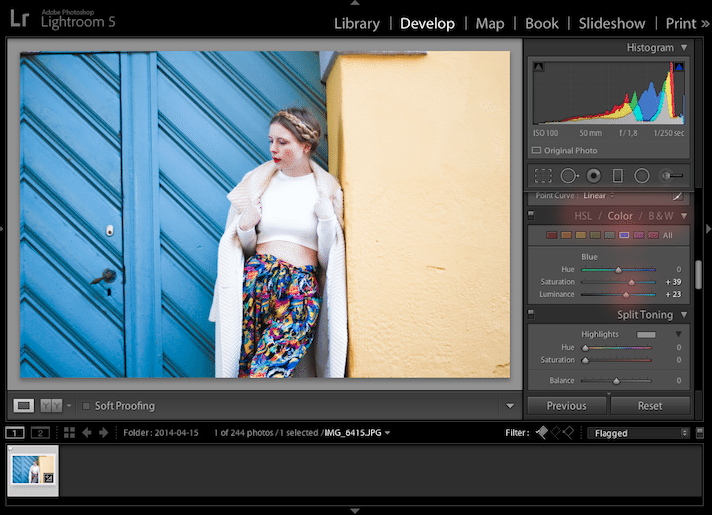 Like with the yellow color, I’d like the blue one to be brighter as well, so I pull the saturation and luminance sliders right, too.
3: THE RIGHT ANGLE
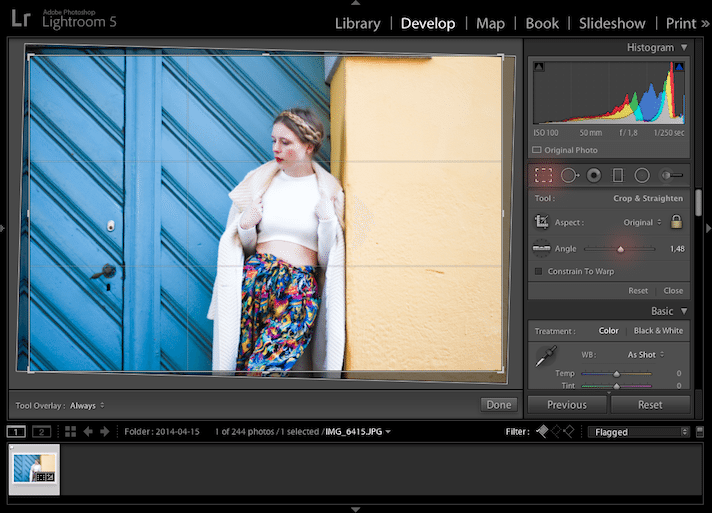 To make the lines in my photo completely vertical, I go to the “Crop”-tool, where I slide the “Angle” slider to one side of the other and use the helping lines to see when my photo has perfect vertical and horizontal lines.
4: BEFORE AND AFTER
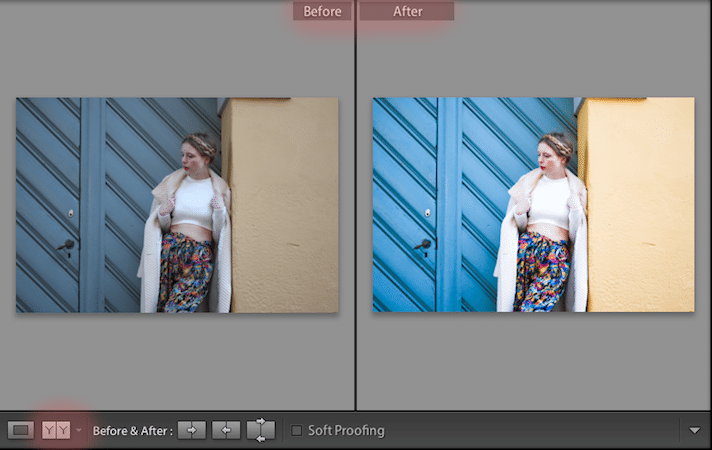 Clicking the Y/Y-button on the left below the photo, makes the original version of the photo appear beside the edited one. Quite a difference, huh?
5: CORRECTIONS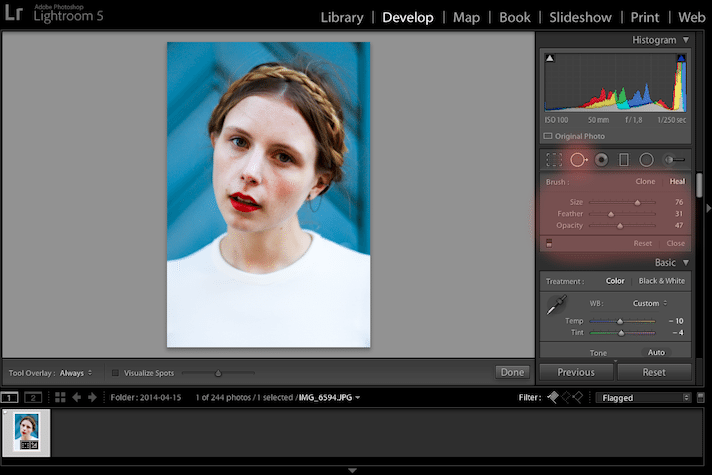
I usually correct imperfections on my skin, when editing – I’d rather like my shots to be about my clothes and look than about a zit on my forehead or dark circles under my eyes. Lightroom help me fix that as well! Going to the “Heal” tool in the sidebar gets you going on correcting your skin.

(CLICK ON THE PHOTO TO MAKE IT BIGGER) To correct an imperfection on your skin you should, after having gone to the “Heal” tool, click on your imperfection. Lightroom will then find a spot in the photo that it figures fits your imperfection well. You can move the spot using your mouse. Now, your imperfection is a merge of your imperfection(on the left picture) and the new spot(on the right picture). To decide how your imperfection should be hidden, you can use the “Opacity” slider to desice how opaque you want the layer of the new spot to be on top of your imperfection. I usually put that slider on 50% or less, since I think it becomes too visible when you have tried to correct an imperfection by sliding the opacity higher. And it just looks more natural when there’s a bit of wrinkles left on your skin, so that you don’t look like a model from a mascara ad. To change up the size of your healing cicle, you can scroll on your mousepad or use the “Size” slider in the top of the “Heal” toolbox.
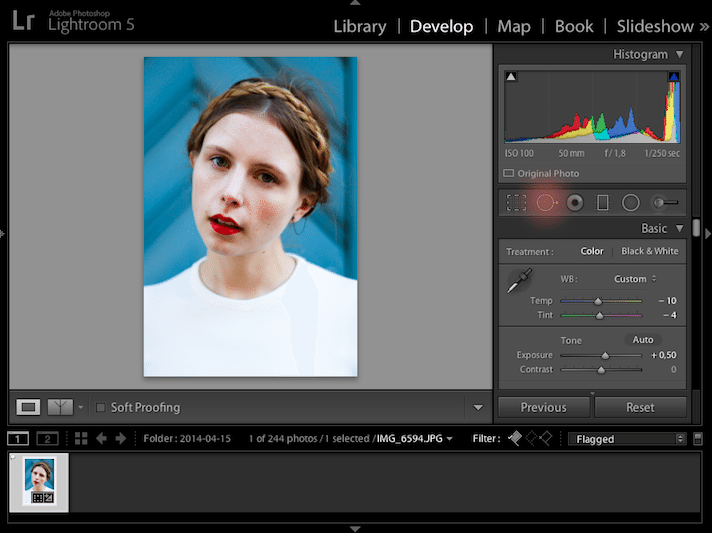 Now my skin looks more even – especially the dark circles under my eyes that showed signs of a long day at work before the photos were taken.
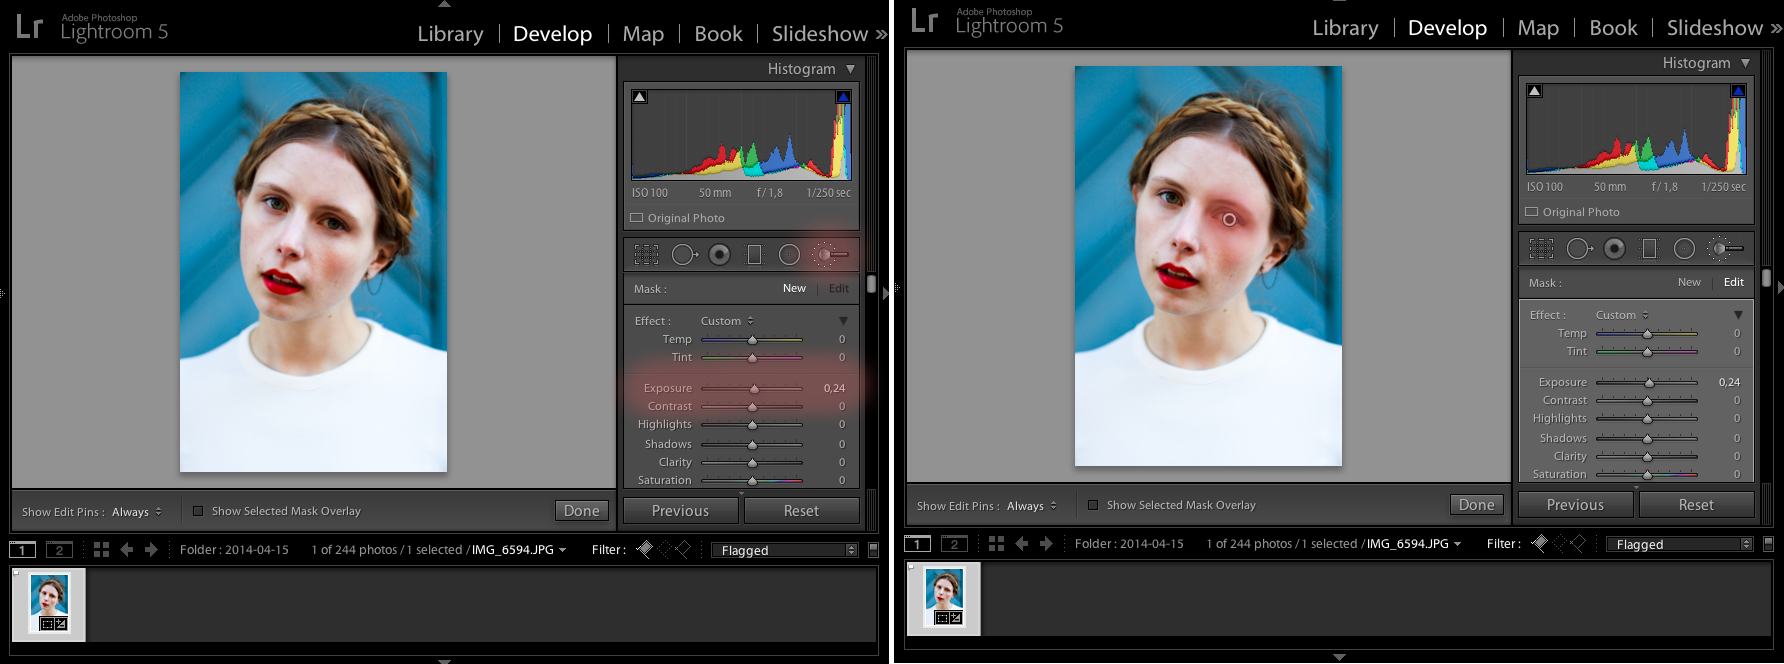 (CLICK ON THE PHOTO TO MAKE IT BIGGER) I think that one eye is a bit too dark simpered to the other one, and that can easily be handled as well. I go to the “Brush” tool in the side bar and pick the slider that can help me fix my problem – for this, I’ll be using the exposure slider to turn up the light. When lighting up or darkening areas in photos, you should usually stay right below 0,30 go -0,30, since going higher or lower can make it look fake. Then I pick the size of my brush by scrolling on the mousepad and when it fits the area to be lightened, I click there.
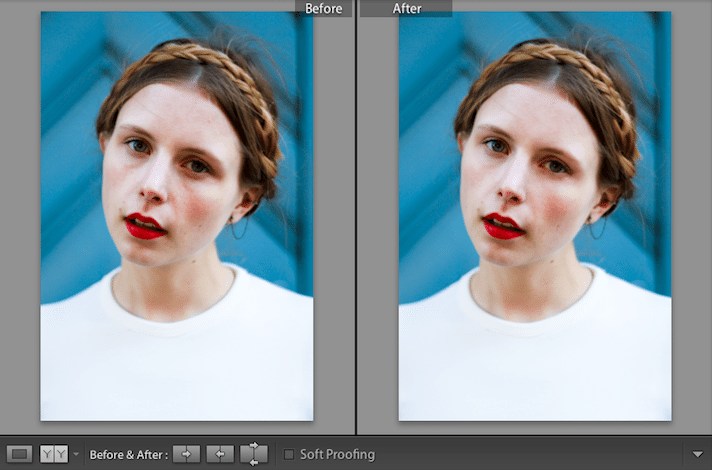 Now my photo is just the way I want it – in the Y/Y-function, my corrections to the photo really show.
I hope you enjoyed the photo school! You can find all of my Sunday photo schools by clicking on the photo school photo in my little category slideshow in the top of my sidebar.